|
10.17 Multiple Signatures
KB 2576, Release Note, Service Development, 6/15/2023
Document Management has been re-worked in 10.17 to support the brand-new Multiple Signatures feature! With a new multi-purpose interface, Multiple Signatures for each type of document can be set up per Shop in a single window.
The changes described in this document have been implemented across all Department Document Management/Maintenance windows. The Service Department will be impacted the most by this feature, enabling them to comply with Manufacturer requirements for work approval by collecting more than one signature on a specific document.
When updating to 10.17, the current printer settings will be carried over. If there is a Signature set up on the signature pad it will also transfer over and a second group will be automatically created for Initials, with a None prompt.
Note: The example described in this document is one for a Service Order document.
Document Management Window - Re-Design
There are less clicks required to access the Document Management window as the Document and Shop selector menu pop-ups have been removed completely.
To access this feature, follow the path:
Fixed Ops > Service Order > Maintenance > Service Setups > Document Management
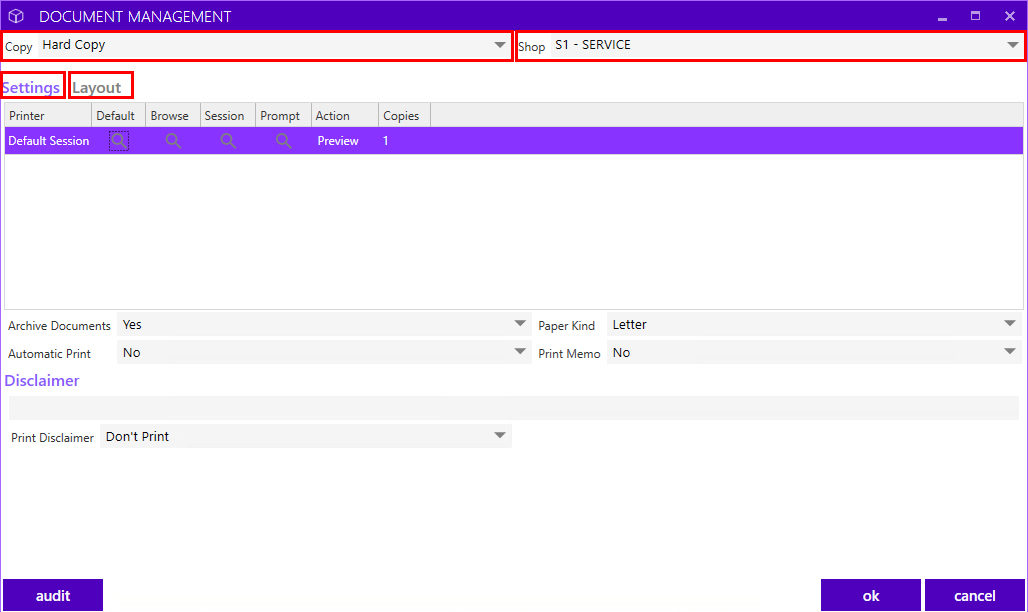
At the top of the screen, there is a new
Copy
drop-down menu with a list of all the documents in a specific Department. Additionally, choose the shop from the
Shop
drop-down as each's Shop's Document Management is set up separately.
For better organization, there are two tabs. All the Printer settings are located in their own
Settings
tab and the new
Layout
tab includes all layout configurations for a specific document. Based on the document that you choose in the drop down, the setups will change.
Layout Tab
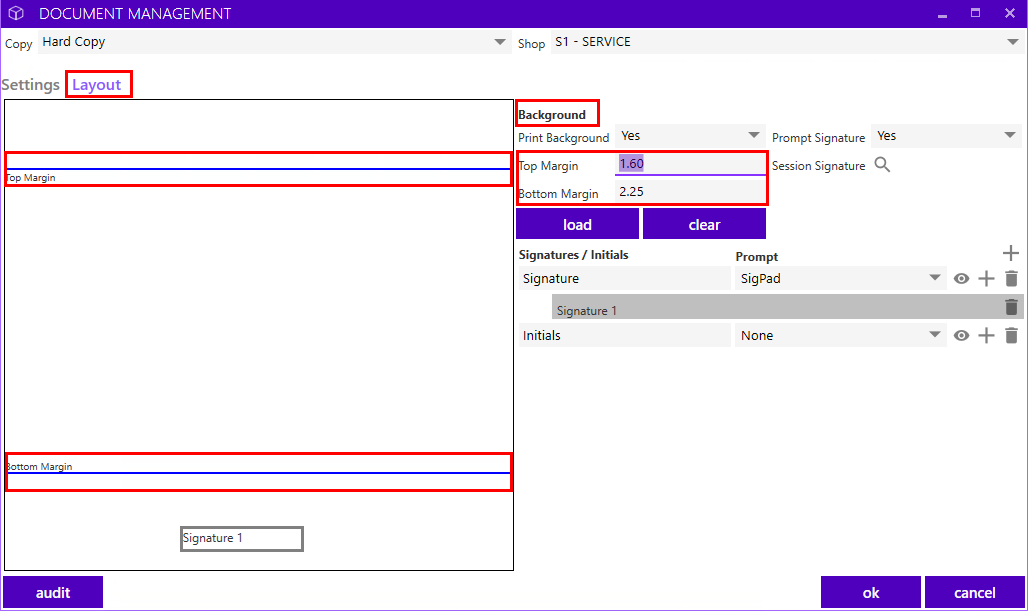
Background
Margin lines are visible in the preview to help define where text begins and ends. All other background setups and buttons, function the same as they did previously.
Signature Groups - Signatures/ Initials
This section provides the tools to create multiple Signature Groups and Signature Boxes within the main group.
The purpose of Groups is to streamline the process of collecting signatures. Your Customer simply needs to sign once, and it will then display the signature across multiple places throughout the document where the boxes are located in the group.
How to Create Signatures Groups and Boxes
-
Click the "+" icon to create a new signature Group and give it name.
-
Click the "+" icon within the main group to create multiple signature boxes. As boxes are added, they will populate in the preview.
Each Signature Group can have a different way to prompt for the signature. The default will be set to
None,
and a selection will need to be made from the drop down.
There are 2 ways to capture Signatures:
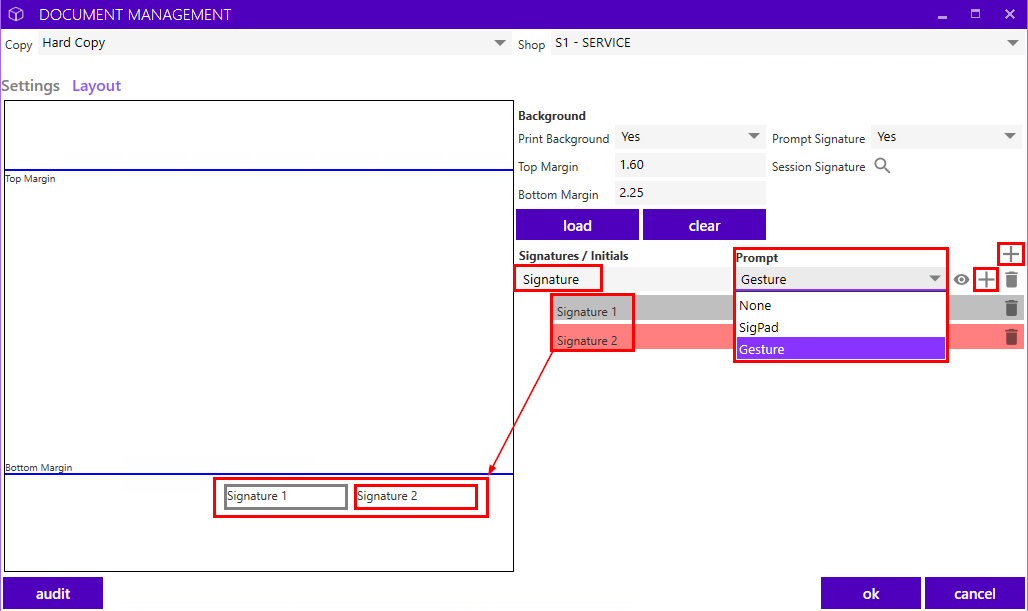
By selecting a specific signature box in the relevant Group, that box will become active. Hovering over the box in the preview section, the pointer cursor provides the ability to re-position it as well as re-size. The Signature Box must be selected from the right side before any changes can be made.
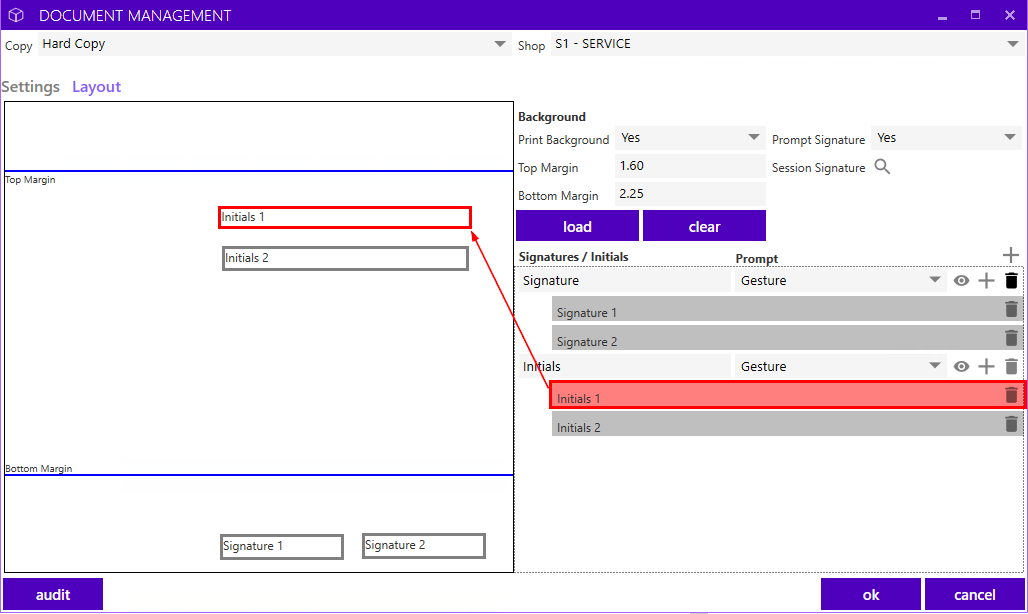
Other icons
-
The
garbage
icon allows the ability to delete Groups and Boxes.
-
The
eye
icon will highlight (in green) all the signatures in each Group, making it easier to identify which boxes belong to which group.
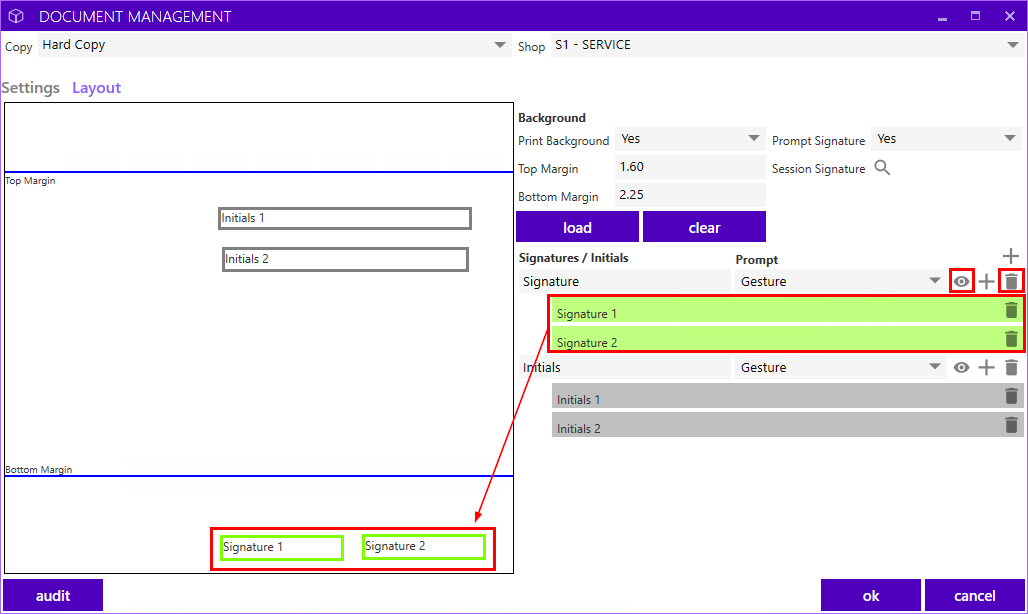
Let's take a look at an example!
Example
Hard Copy
document for
S1
Shop is set up with two Groups;
Signature
and
Initials,
with each main group including multiple signature boxes. For the purpose of this example, both have been set up to prompt with Gesture.
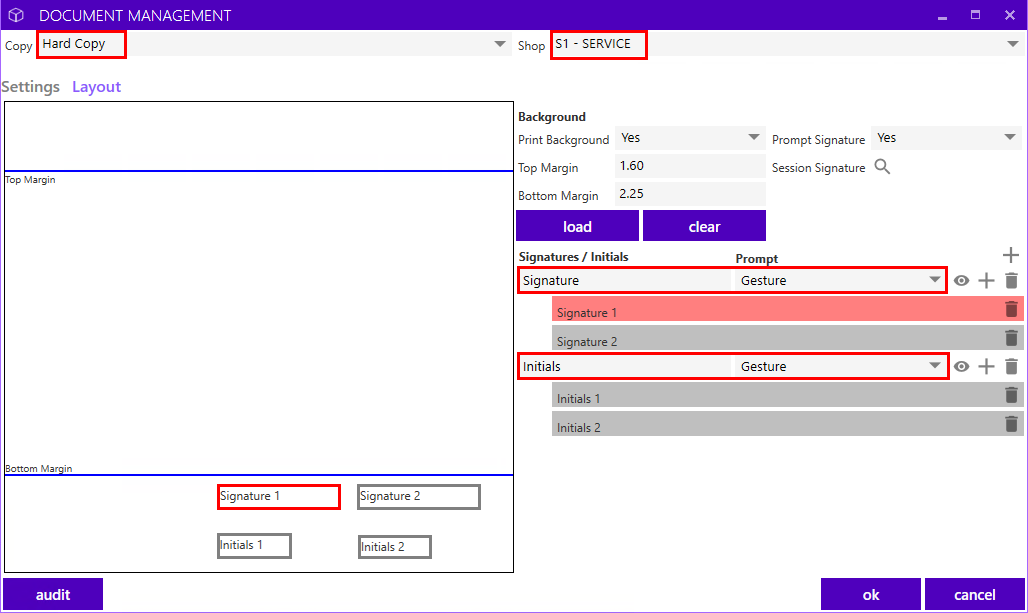
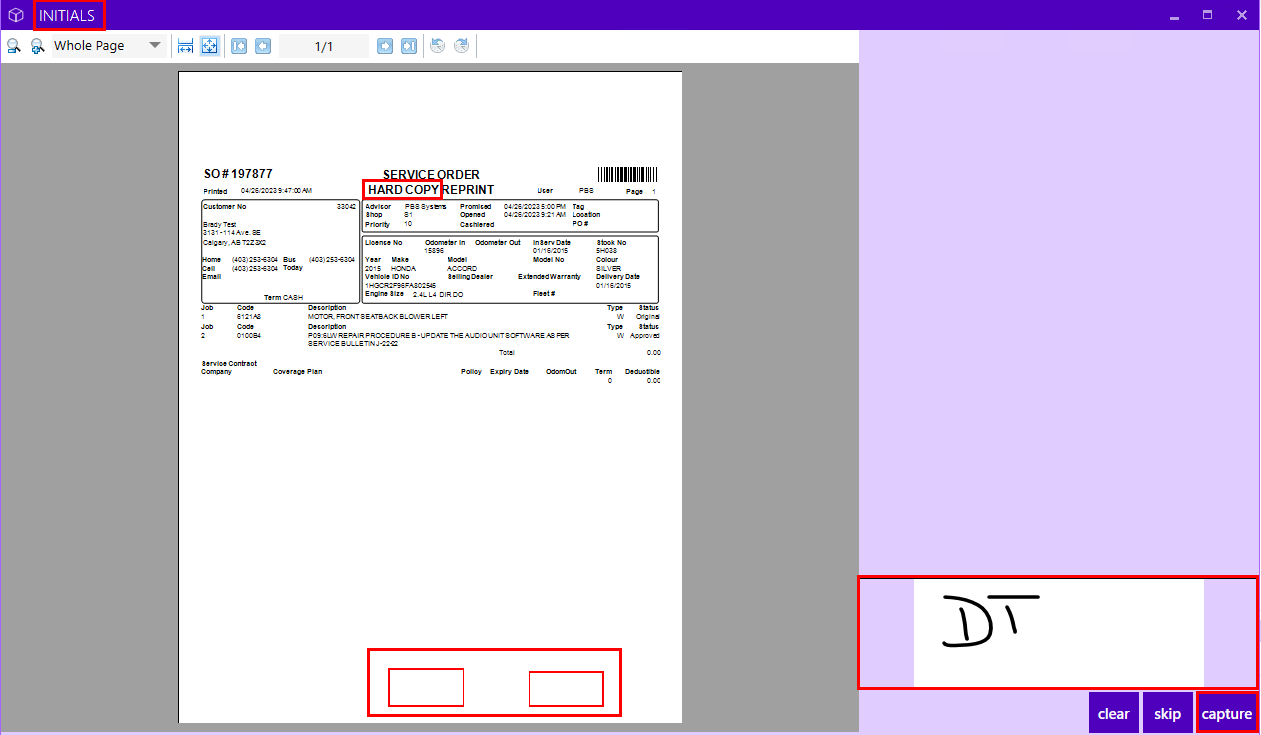
Based on the setups above, the following steps illustrate how to capture Multiple Signatures on the Hard Copy.
1.
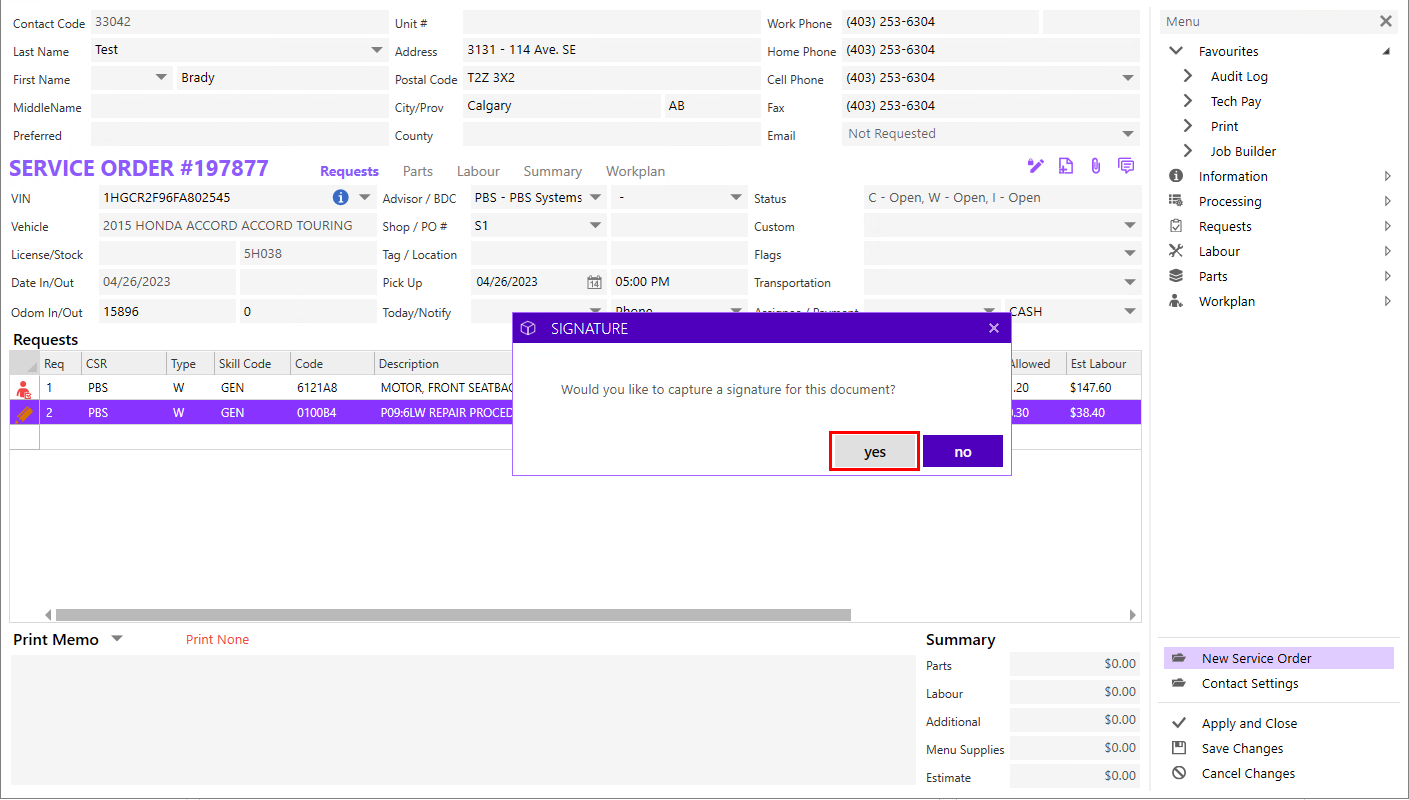
Upon saving the Service Order,
yes
is selected on the Capture Signature prompt.
2.
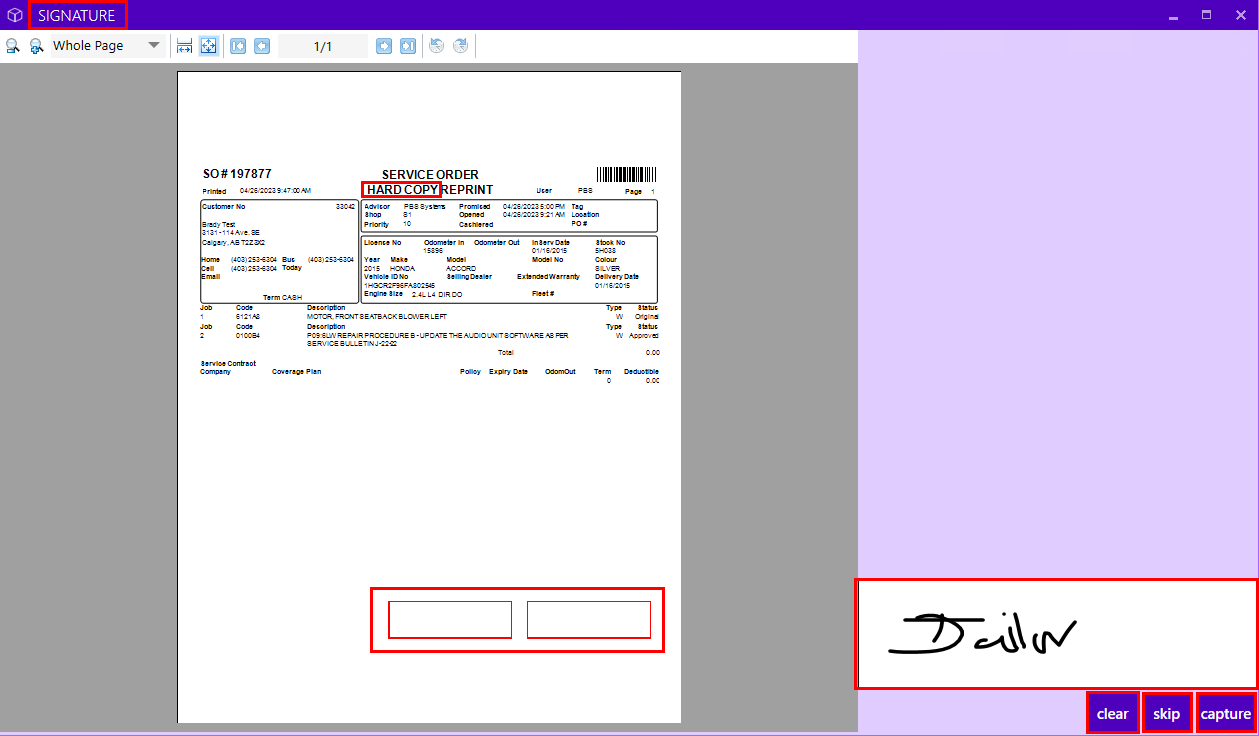
The preview shows two boxes in the first
Signature
Group. With the mouse, the signature is entered into the white signature box. The
capture
button saves the signature and moves to the second Signature Group.
Clear
button will erase the signature.
Skip
button will move to the next Signature group.
3.
The second Signature Group is for collecting
Initials.
The
capture
button saves the initials and then presents the document.
4.
The Signatures and Initials are displayed on the Hard Copy as per the setups in Document Management.

|