|
10.11 Cheque/Check Printing Rework
KB 1524, Release Note, Accounts Payable, 1/30/2026
* The changes made in the project will make setting up cheques/checks easier and more precise. This rework will give Users the option to use blank cheque/check stock along with the ability to design the cheque/check layout.
How to Set Up Cheque/Check Layouts
Cheque Printing Maintenance can be found on the Main Menu under
* Accounting > Accounts Payable > Maintenance > Cheque Printing
or, by going into Bank Account Maintenance which can be found on the Main Menu under
* Accounting > Bank Manager > Maintenance > Bank Accounts
Select the Cheque Setup Button.

To rework the layout of your cheque/check, press the Layout button. If you are setting up a brand new layout, we recommend using the Restore Default button so all available fields will be shown. *For this example, we will restore defaults.

Pressing Restore Default will first warn the User that they are restoring the layout of their cheque/check and then it will ask if they would like to use split date boxes. If your cheque/check stock has individual boxes for the date (eg. D D M M Y Y Y Y) then choose Yes to use Split Date Boxes. If your cheque stock has one field for the date (eg. Date
________________
) then choose No.

*For this example, we will use Split Date Boxes.
Split Date Boxes
Split Date Boxes often require each character within the Date to have some spacing between them. To adjust the spacing between characters select the Day, Month and Year text boxes.

* Note: Some Users find it easier to select the fields from the right-hand menu by expanding the "grpPageHeader" and clicking on the field they want to edit from the menu.
Once the Day, Month and Year fields are selected, select the Property Dialog Hyperlink.
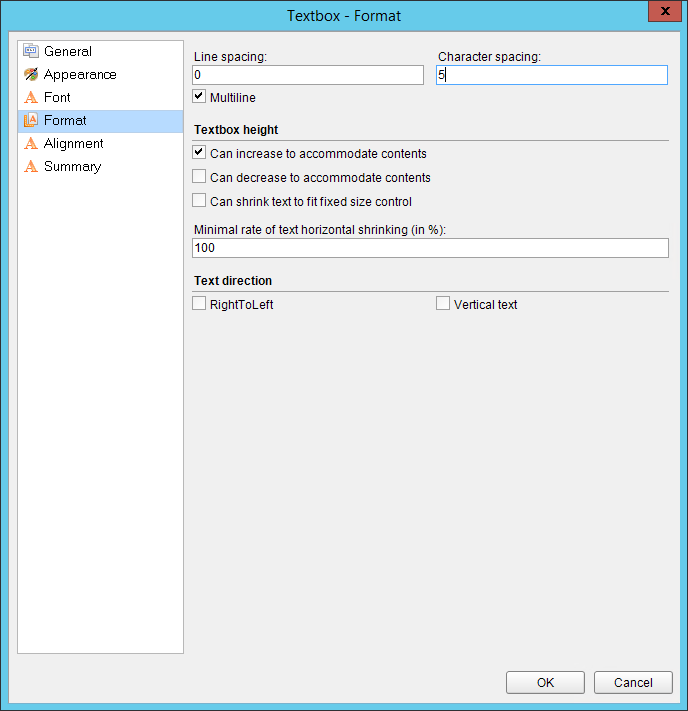
Navigate to the Format Section and adjust the character spacing based on your cheque/check stock. We recommend setting this to 5 for most cheque/check stock that uses Split Date Boxes. Press OK and do this for each date field.
Changing the Layout of Cheques/checks
The new report designer allows you to easily drag fields around to move them. Smart gridlines will also help you align your text boxes. When you see a blue line appear it means your text box is in alignment with another text box.
Arrange your cheque in the format that matches your cheque stock.
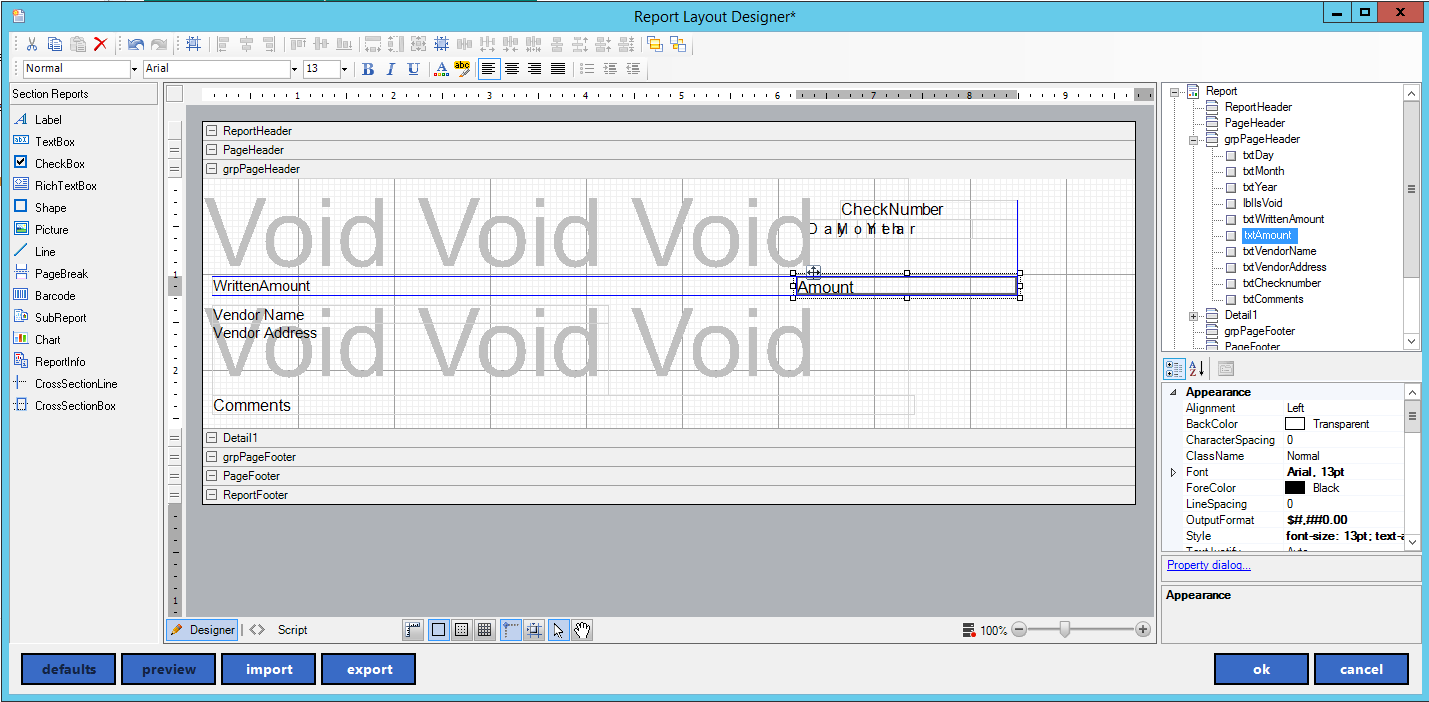
*Note: the grid uses real measurements so if you want to be precise pull out your ruler!
Changing the Format of Fields
Some cheque/check stock has the dollar signs pre-printed and others do not. To change the format of the amount that prints to either include or exclude the dollar sign, select the Amount field.
When the Amount field is selected go to the Appearance Menu on the right side of the screen and look for the field labelled *OutputFormat.
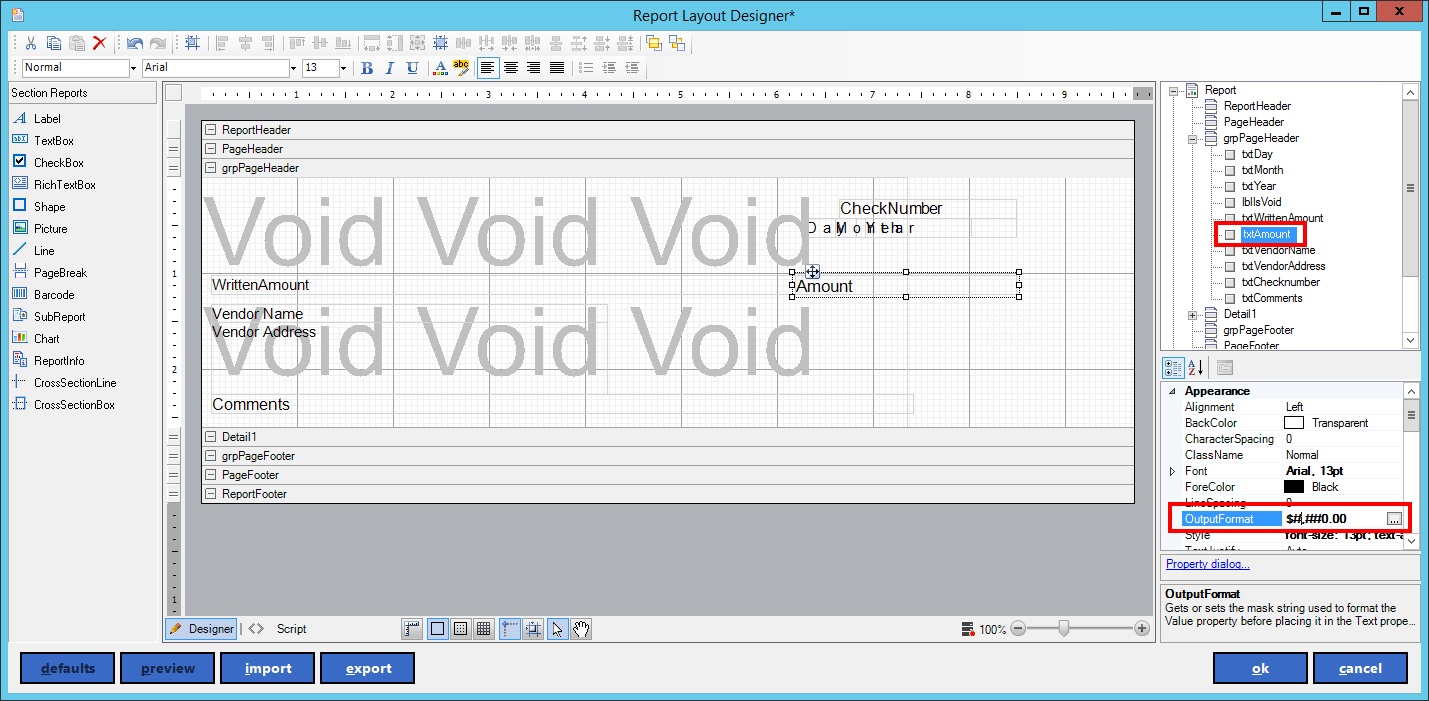
Here you can see the format is set to have a $ before the amount. To change this simply click and delete the dollar sign from the "OutputFormat" field. Alternatively, if you want the Dollar sign to be printed, click and add it back in.
Visible Fields
If there are fields that you do not want to print on your cheque/check, such as comments, you can set them to not be visible. Select the field that you would like not to print on your cheque/check.
On the bottom right side menu under Behaviour, locate the field called *Visible.

If you would like this field not to be printed on your cheque/check then set this to False. Alternatively, if you would like this field to print on your cheque/check, set this to True.
Adding Text Boxes
If you would like to add any other text to your cheque that is not a default field this can be done by clicking TextBox on the Left Menu of the screen and dragging it into the layout grid.
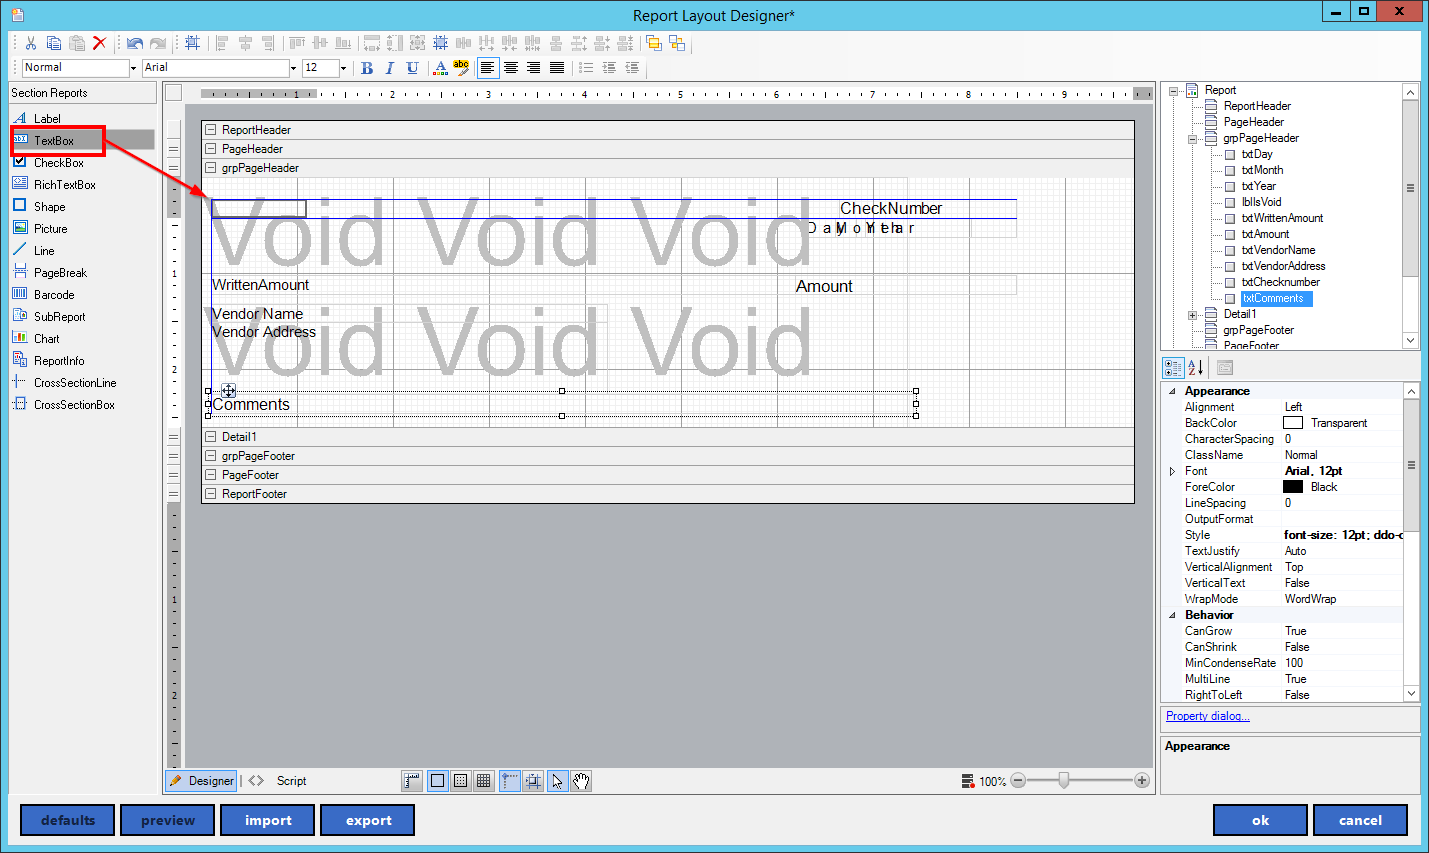
You can reposition and resize your TextBox once it is in the grid.
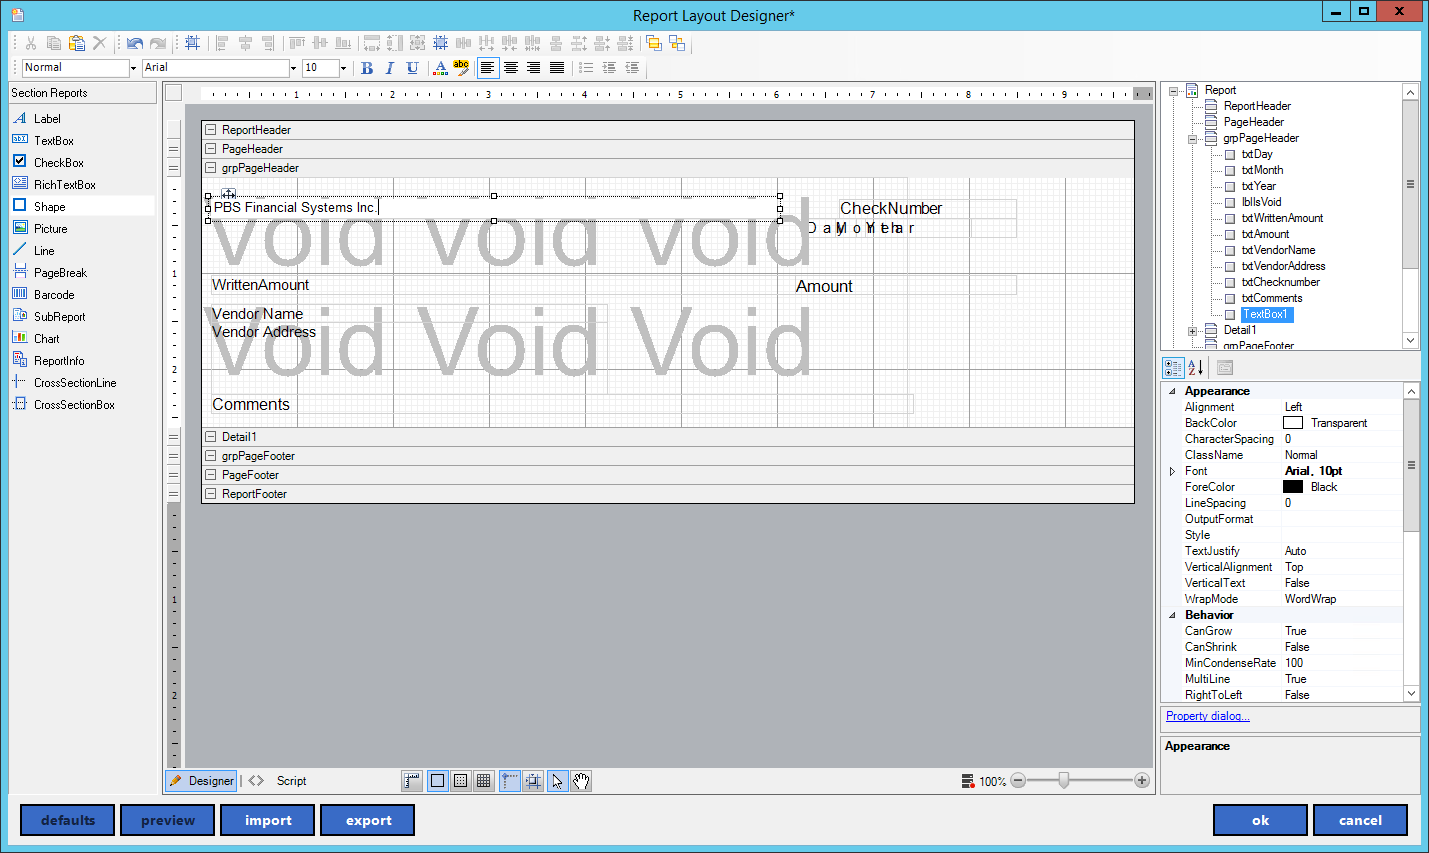
To edit your TextBox, double click on the field and enter the text that you would like to print on the cheque. This is great if you want to use blank cheque/check stock; it allows the User to do things like enter the Dealership Name.
Changing Size and Font
You can also change the size and font of any field on your cheque.
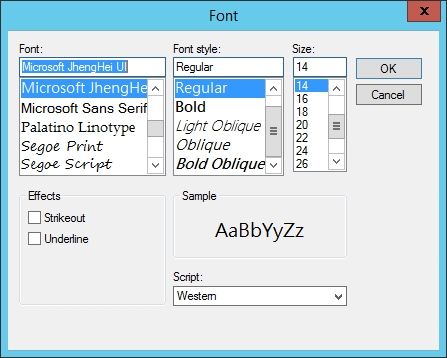
Select the field you want to edit. On the bottom right side menu under Appearance, locate the Font field. Click on the three dots and it will bring up a size and font selection.
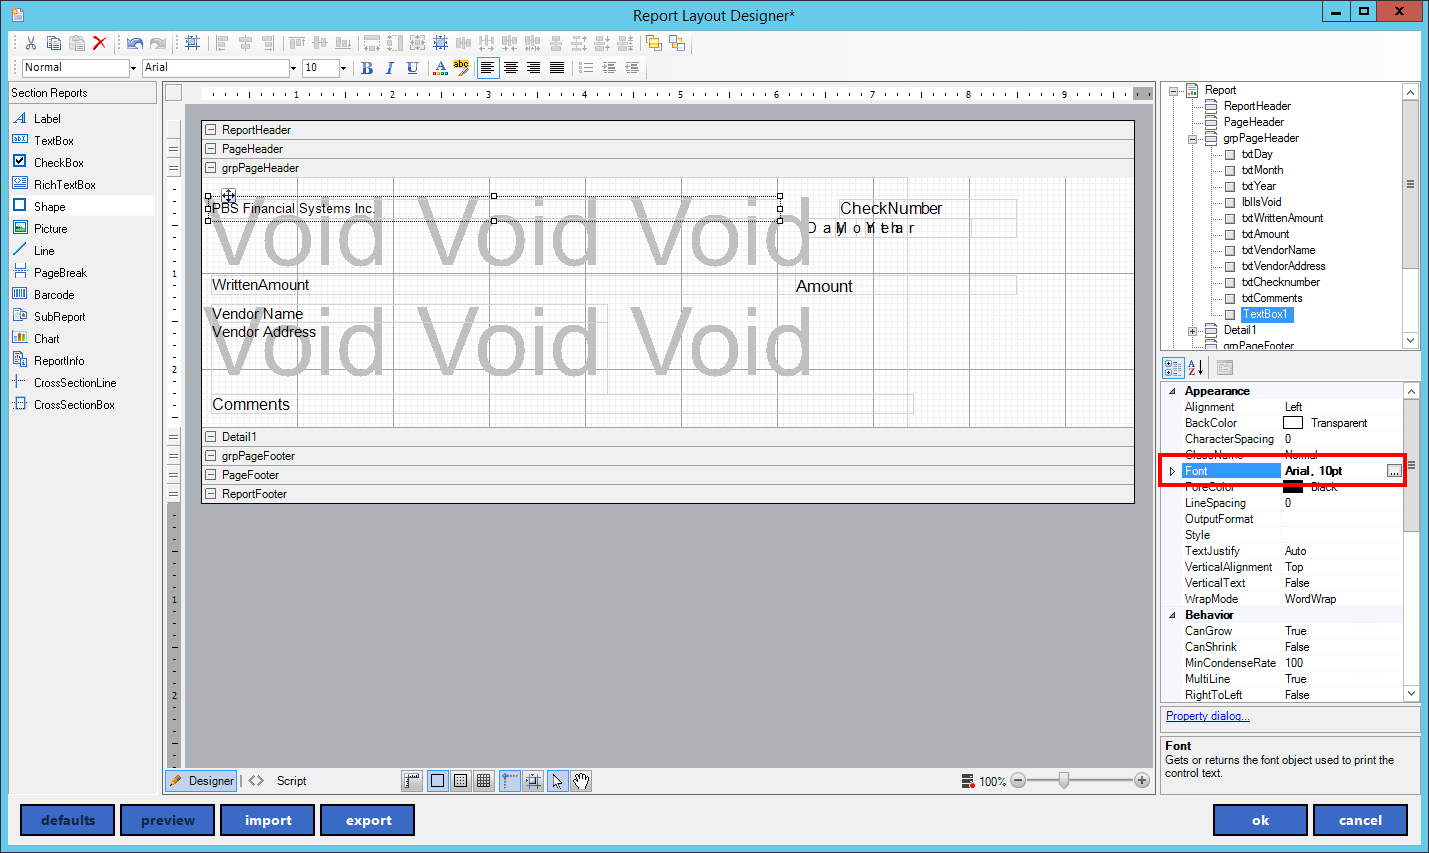
Select your Font and size then press OK.
Adding an Image
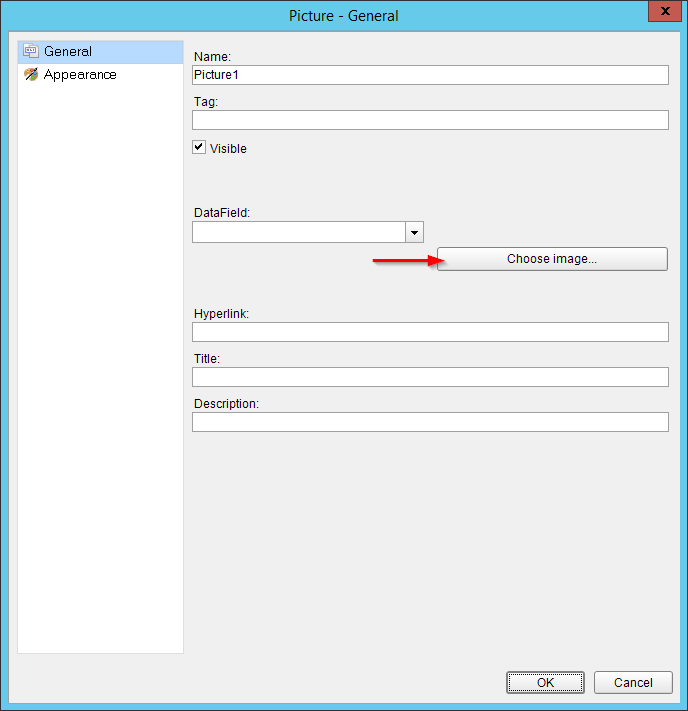
If you want to add your Dealership Logo or any other image, select the Picture link on the Left Side menu and drag it into the Layout Grid.
Resize the picture box and align it to the placement you would like to print on your cheque/check. Then select the Property Dialog Hyperlink on the right side menu.

On the General View, select Choose Image. Locate the image in your file explorer and press OK. Before exiting the window, navigate to the Appearance View.
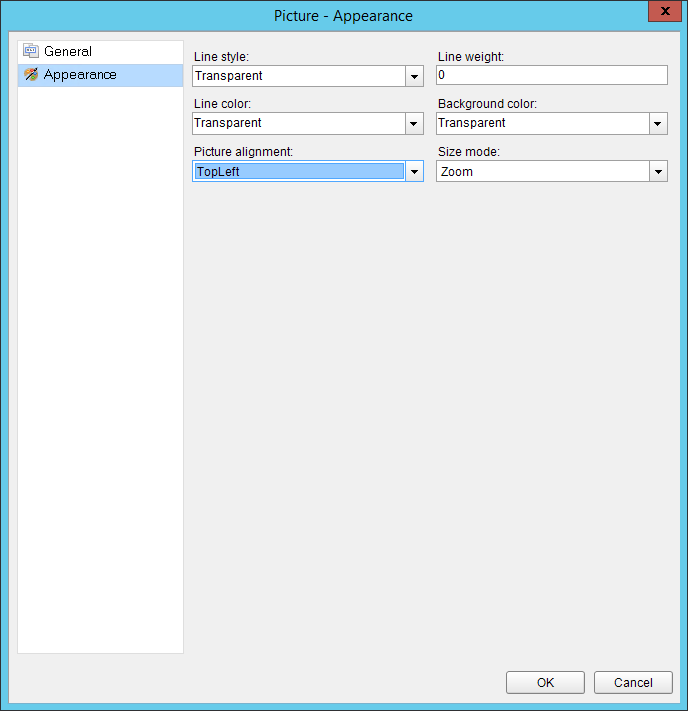
To avoid image distortion we recommend setting the Size mode to Zoom. You can also set the picture alignment based on how you want the image to display on the cheque/check. In this example, we will choose Top Left. Press OK.
Once you have your cheque/check layout complete press OK.

We recommend doing a test print to make sure your cheque/check prints exactly how you want. If your cheque/check lines up and everything looks good press OK.
MICR Printing
If you do decide to go down the road of using blank cheque/check stock you will need to have MICR Printing enabled.
*Please Contact PBS to enable this for you.
Once MICR Printing is enabled, you will see the third view in your Bank Account Maintenance Screen. Select the MICR Printing tab and choose Yes from the User MICR Printing dropdown. Then enter your Banks' Transit, Institution, and Destination Numbers. The bank account# will pull from your general bank information up above.
You will need to arrange these fields in a cheque/check layout. Select the Cheque Setup button.
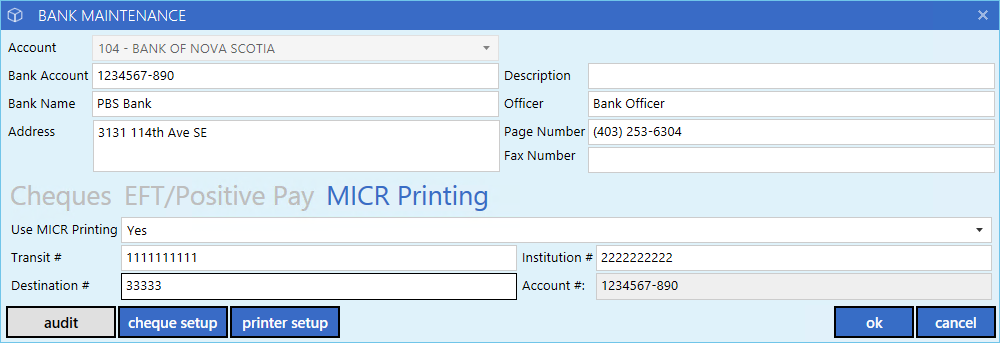
Select the Layout button.

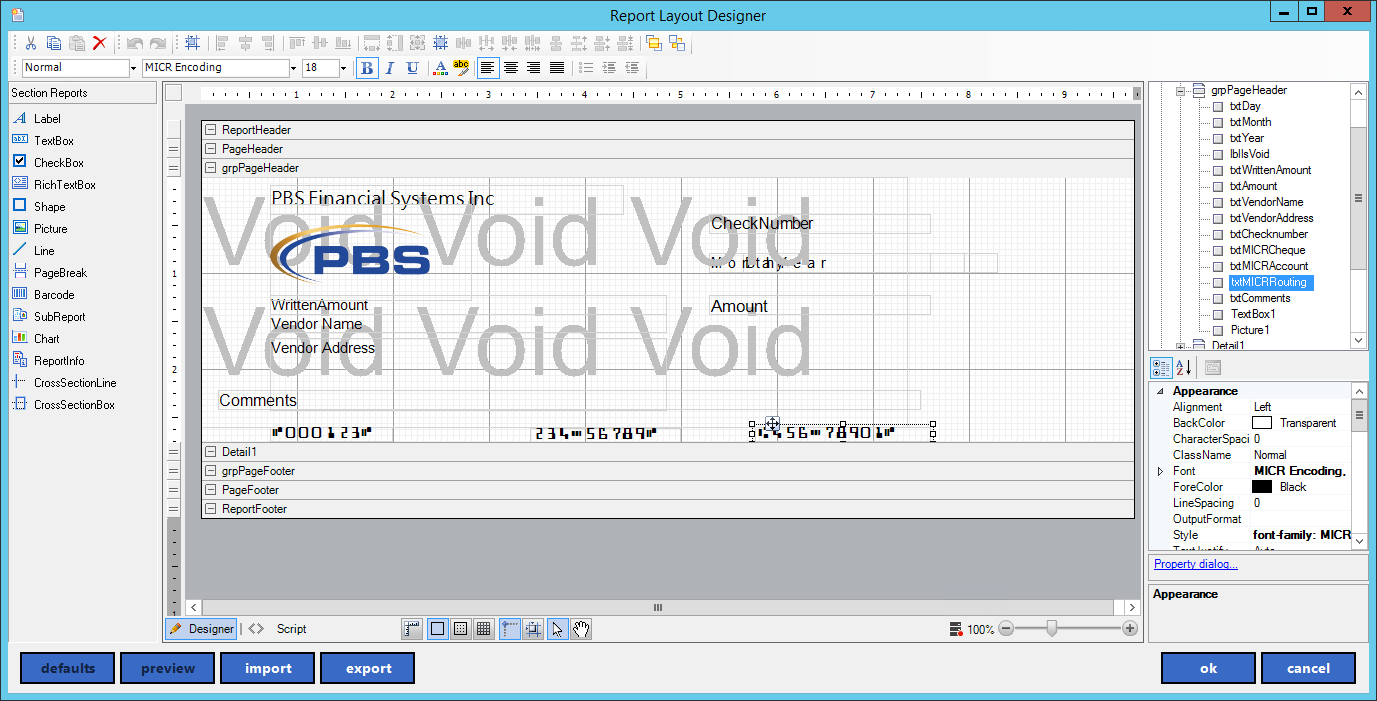
Expand the "grpPageHeader" Section on the top-right menu. Then select the "txtMICRRouting" field. Drag this into position on the layout grid. Do this for the "txtMICRAccount" and the "txtMICRCheque" fields as well.
|