|
10.23 Parts Pick Ticket Label Printing
KB 3228, Release Note, Parts Development, 10/21/2025
Version 10.23 brings powerful upgrades to Pick Ticket Label printing - making it easier than ever for Parts Department to stay efficient and organized!
-
New Label Selection Window: A brand -new window allows Users to select exactly which Parts require Pick Ticket Labels. This added control reduces unnecessary printing and streamlines the overall process.
-
Automatic Printing by Contact Preference: When a Contact is set to print by default, labels will now print automatically during cashiering - saving time and reducing manual effort.
-
Enhanced Label Designer: The Pick Ticket Label Designer Tool now supports new data fields, including Tech Code and Tech Name. This makes the labels more informative and improves communication with the Service Department.
-
Audit Log Tracking: All label printing actions are now recorded in the Audit Log, offering complete visibility and accountability.
These enhancements are available on both Parts Invoices and Service Orders, helping you maintain clarity, reduce waste, and improve workflow from start to finish.
Read on to explore these impactful updates in more detail.
Print Pick Ticket Labels
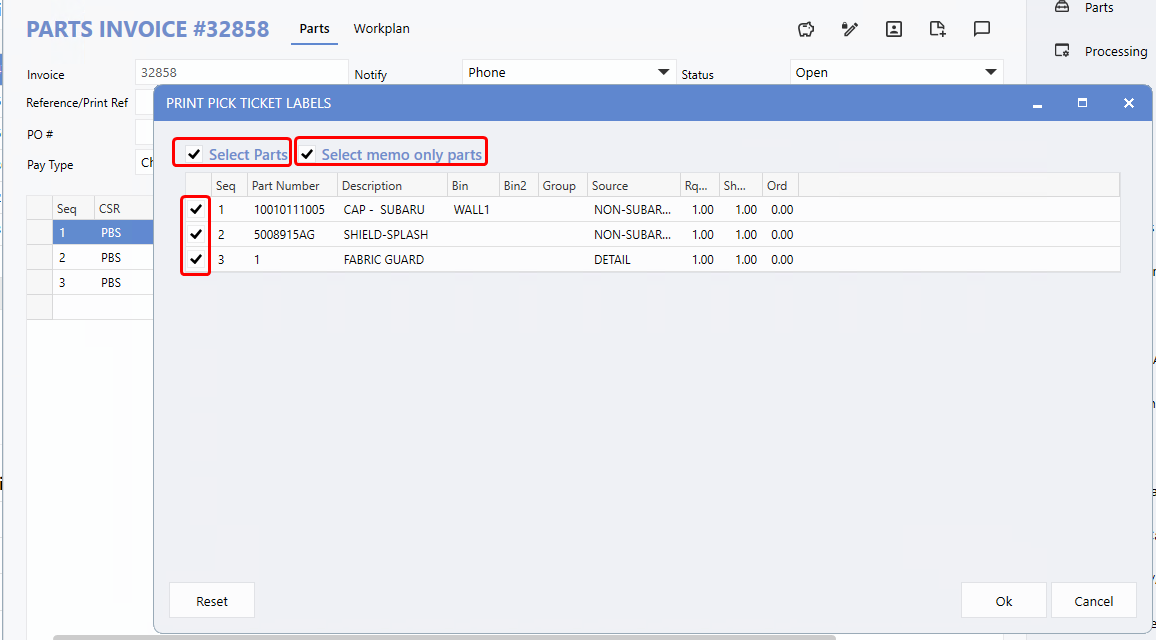
When printing Pick Ticket Labels from the right-hand menu within a work item, Users will now encounter a new, user-friendly window displaying a list of Parts. By default, all Part lines are pre-selected, making it easy to print labels with minimal effort.
At the top of the window, two checkboxes provide additional selection options:
Users can also manually select or deselect individual Part lines using the checkbox beside each row.
A
Reset
button is available to quickly restore the default state, with all Parts selected.
To access this feature, follow the path:
Parts Invoice/Service Order > Processing > Print > Pick Ticket Labels
.
Example:
Parts Invoice - Print Pick Ticket Labels Window
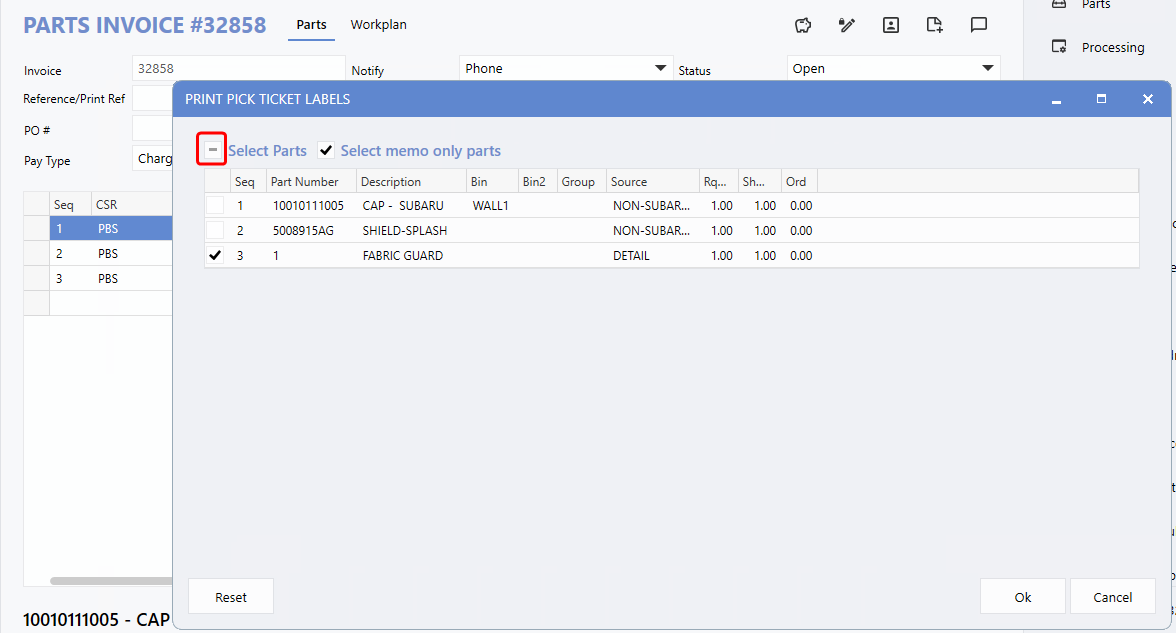
If the
Select Parts
checkbox displays a dash (-), it means that some Parts are selected. Clicking the checkbox will toggle the selection to include all Parts.
Example:
Memo-only part selected, with the "Select Parts" checkbox displaying a dash to indicate partial selection.
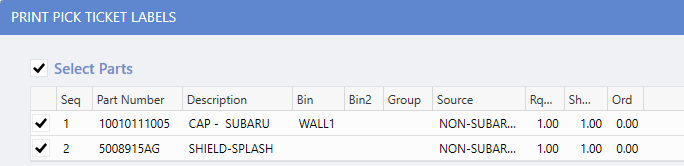
Example:
If there are no memo-only Parts, this option will not display.
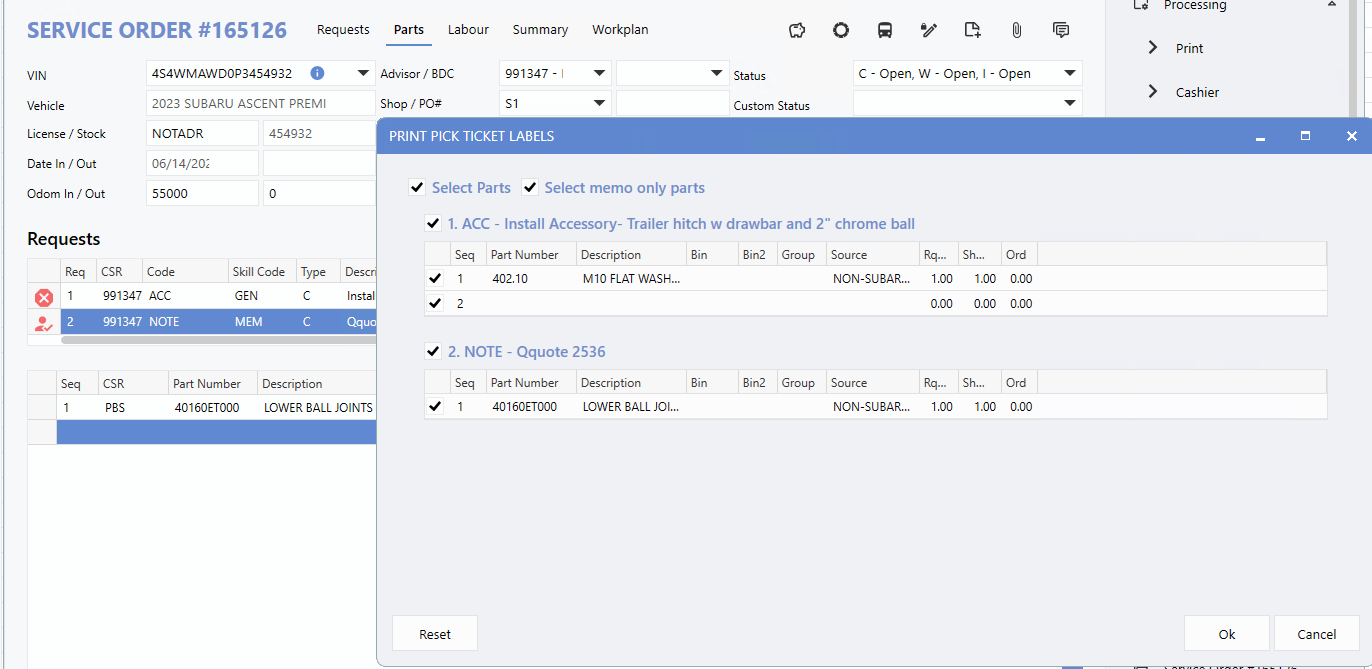
In the
Service Order
, the Pick Ticket Label window features a slightly different layout. Parts are grouped under their corresponding Request lines, making it easier to identify and select the specific Parts that require label printing.
To access this feature, follow the path:
Service Order > Parts tab > Processing (Right-hand menu) > Print > Pick Ticket Labels
Audit Log
Previously, the Audit Log only recorded Pick Ticket Label printing when initiated from the right-hand menu. With this update, it now also captures print actions triggered via the
right-click menu
under
Printing > Print Pick Ticket Labels
in the Parts tab - ensuring consistent and comprehensive tracking across all access points.
To access the Audit Log, follow the path:
Parts Invoice/Service Order > Info (Right-hand menu) > Audit Log

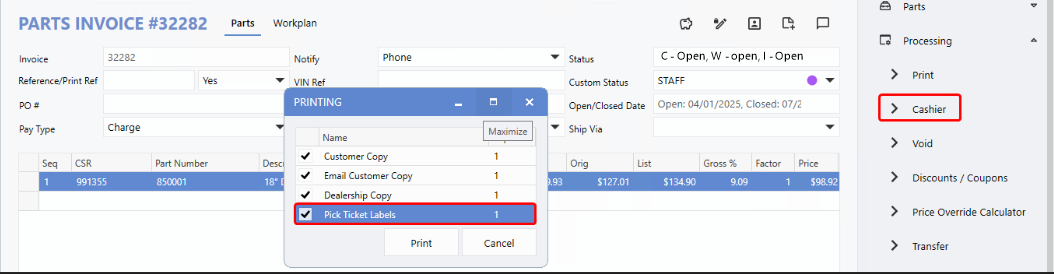
Cashiering Invoices - Pick Ticket Labels
To improve workflow efficiency, Pick Ticket Labels can now be automatically printed during the cashiering process. If the "Always Print Pick Ticket Label" option is enabled in the Contact Settings, the Print window will automatically have the Pick Ticket Label option pre-selected.
Previously, this setting only applied when printing from the right-hand menu. With this update, it now also applies to the cashiering workflow - ensuring a more consistent and streamlined experience for Users.
To access this feature, follow the path:
Parts Invoice/Service Order > Contact Settings > Fixed Ops tab > Always Print Pick Ticket Label > Yes
Example:
When cashiering an Invoice, the Print window now automatically has the Pick Ticket Label option selected
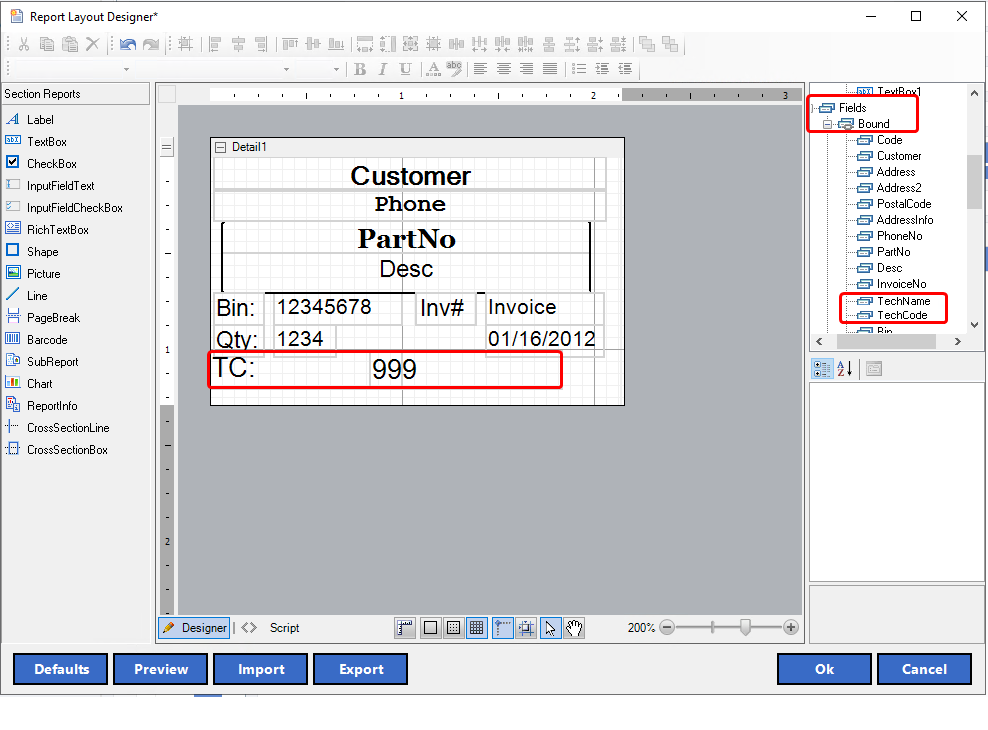
Pick Ticket Labels: Tech Details Added
The Pick Ticket Label Report Designer has been enhanced with two new data fields:
Tech Name
and
Tech Code
. These additions help Dealerships stay organized by clearing identifying assigned Technicians, streamlining job tracking and assignment.
Accessing the Report Layout Designer
1.
Go to
System > Maintenance > Fixed Ops Control File > Parts Receipting,
then click
Edit
.
2.
Click the drop-down arrow next to
Setup Pick Ticket Label Format
to open the Maintenance window.
3.
Click
Add
, select the appropriate printer, and then click
OK
to launch the Report Layout Designer.
Adding Tech Code and Tech Name to the Label:
1.
In the Designer tool, navigate to the right-hand panel and select
Fields > Bound
.
2.
Find
Tech Code
and
Tech Name
, then drag them to the desired location on label.
3.
Use the
TextBox
tool from the left-hand panel to add field labels if needed.
4.
Click
Preview
to review the layout.
5.
Click
OK
to save your changes.
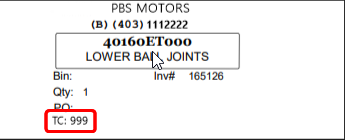
Example:
Pick Ticket Label showing the Tech Code data field (TC)
|