|
10.23 Web Appointment Pages - New Layout
KB 3255, Release Note, Service Development, 9/10/2025
Introducing the all-new Web Appointment pages in Version 10.23 redesigned for a cleaner, faster, and more intuitive experience.
Building on the momentum from Version 10.22 - where Phase 1 of our Unified Web Design introduced a major refresh to the Digital Service Pages - we're taking the next step forward towards a seamless, modern, and consistent experience across all PBS web platforms.
With Version 10.23, the Web Appointment pages have been completely redesigned with the same sleek, modern interface. The result is a polished, professional look that's not only visually striking but also more intuitive to navigate. We've added thoughtful touches like displaying the Customer's name, and providing quick links to choose their preferred language, making the experience more personal and user-friendly.
And that's just the beginning - Version 10.23 also brings powerful enhancements to Shop Maintenance, Transportation Types, and User Maintenance. These updates are designed to streamline workflows, boost efficiency and make managing Web Appointments simpler than ever.
Your Customers will appreciate the smoother, smarter, and more engaging experience - Version 10.23 is here to elevate every step of the digital journey!
Web Appointment - Setups
Shop Maintenance
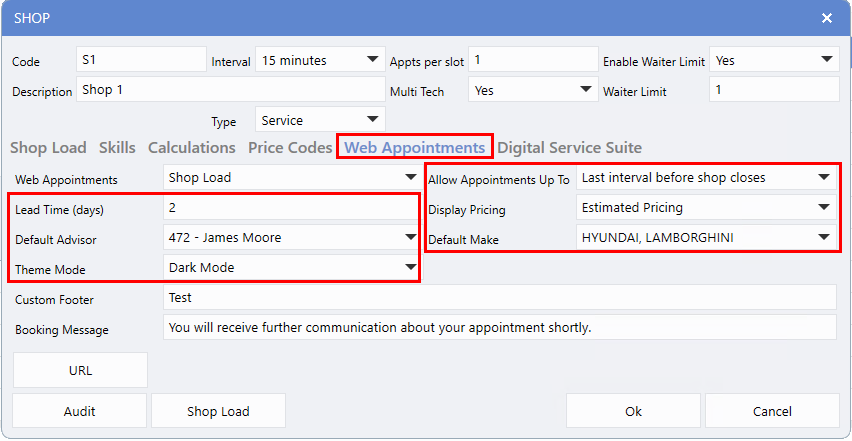
Explore the enhanced
Web Appointment tab
in Shop Maintenance, now offering greater flexibility and more customizable setup options.
Lead Time (days)
The Lead Time field is now a
free-text input
, accepting up to two digits (maximum of 99 days). This provides Dealerships with greater flexibility to define their own lead times and extend booking availability further into the future.
Default Advisor
Inbound PBS Web Appointments previously defaulted PBS as the Advisor. Dealerships can now set a new default Advisor for all incoming Appointments by selecting one from the drop-down list in Shop Maintenance. If a Customer does not choose an Advisor during booking, the Appointment will automatically assign the
Default Advisor
you've configured.
Note
: If no Advisor is selected (left blank), the system will continue to default to PBS as the Advisor.
Theme Mode
This setting helps Dealerships maintain a consistent look and feel between their website and the embedded PBS Web Appointments page. By selecting either
Dark
or
Light mode
, the Appointments page seamlessly aligns with the website's overall theme and aesthetic.
Allow Appointment Up To
Previously, this drop-down only displayed options starting from 1-2. It has now been expanded to provide a wider range of choices for Dealerships that do not use one-hour time slots.
For example, if a Dealership operates with 15 minute intervals and runs an efficient schedule, they can now maximize booking availability right up to closing time. In the past, a shop closing at 4:00 pm would have its last available appointment default to 3:00 pm. With this update, the final slot can now be set to 3:45pm, allowing Dealerships to fully utilize their schedule - perfect for shorter jobs rather than major repairs.
Display Pricing
In Op Code setups, when an Op Code includes
estimated Parts or Labour pricing
, this setting lets Dealerships decide whether that pricing is shown to the Customer.
Default Make
The
Default Make
option lets Dealerships prioritize specific Makes in the drop-down list. When Customers add a new Vehicle to an Appointment, the selected Makes will appear at the top for quicker selection.
To access the options, follow the path:
Fixed Ops > Service Order > Maintenance > Service Setups > Shop Maintenance > Web Appointment tab
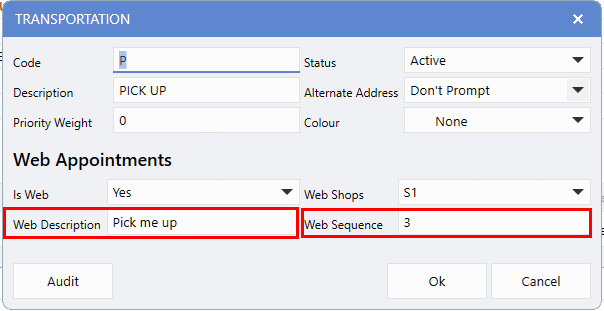
Transportation Types
We discovered that Customers were often unclear about Transportation type options while booking Appointments. For example, selecting
None
led some to believe they would wait at the Dealership, while others assumed it meant they required a ride. Similarly, choosing "Shuttle" or "Loaner" sometimes created expectations that a Loaner Vehicle would automatically be ready upon arrival.
To improve clarity and enhance the booking experience, we've introduced web-friendly descriptions for Transportation types. For example, "Loaner" may now appear as "Request a Loaner" to better reflect the Customer's intent. An example of this update is shown later in the document.
Dealerships can customize these descriptions in Transportation Maintenance. If no custom
Web Description
is provided, the system will display a clear, default, name. Additionally, we've added a new
Web Sequence
option, allowing Dealerships to control the order in which Transportation types are shown to Customers during booking.
To access the options, follow the path:
Fixed Ops > Service Order > Maintenance > Service Setups > Transportation Types
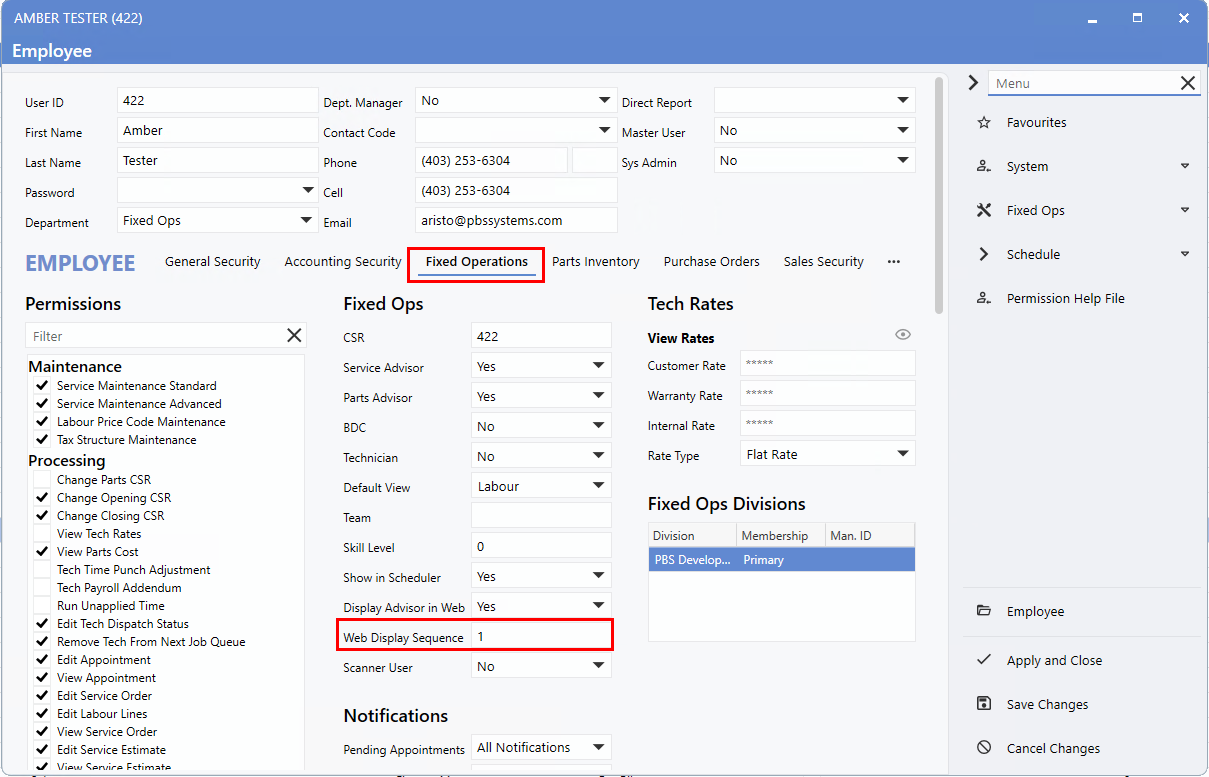
User Maintenance
A new
Web Display Sequence
option has been added to the User Record. This feature is particularly useful for Dealerships that have a dedicated Service Advisor or one who manages most Web Appointments. It allows you to control the order in which Advisors appear in the Customer-facing list - ensuring a preferred Advisor appears first, last, or in any desired position.
In the example below, the Display Advisor in Web flag is set to "Yes," and the
Web Display Sequence
is set to "1", placing that Advisor at the top of the list. If multiple Advisors share the same sequence number, they will appear alphabetically.
To access the options, follow the path:
Employee > User Maintenance > Users > Select User > Fixed Operations > Web Display Sequence
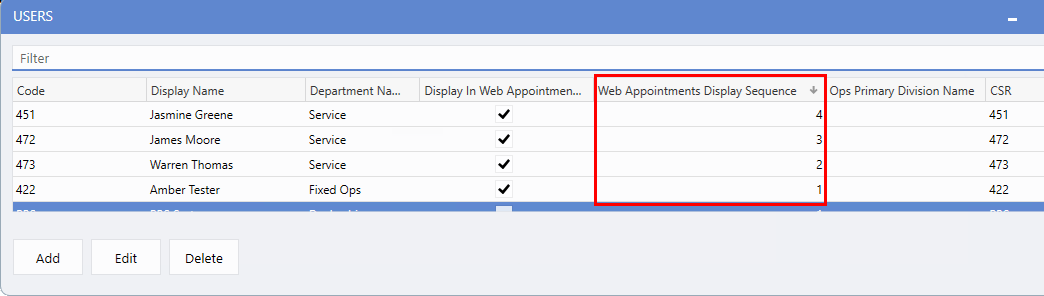
You can quickly view each Advisor's assigned web sequence in the
Web Appointment Display Sequence
column within the User Maintenance window.
Web Appointments - Web Pages
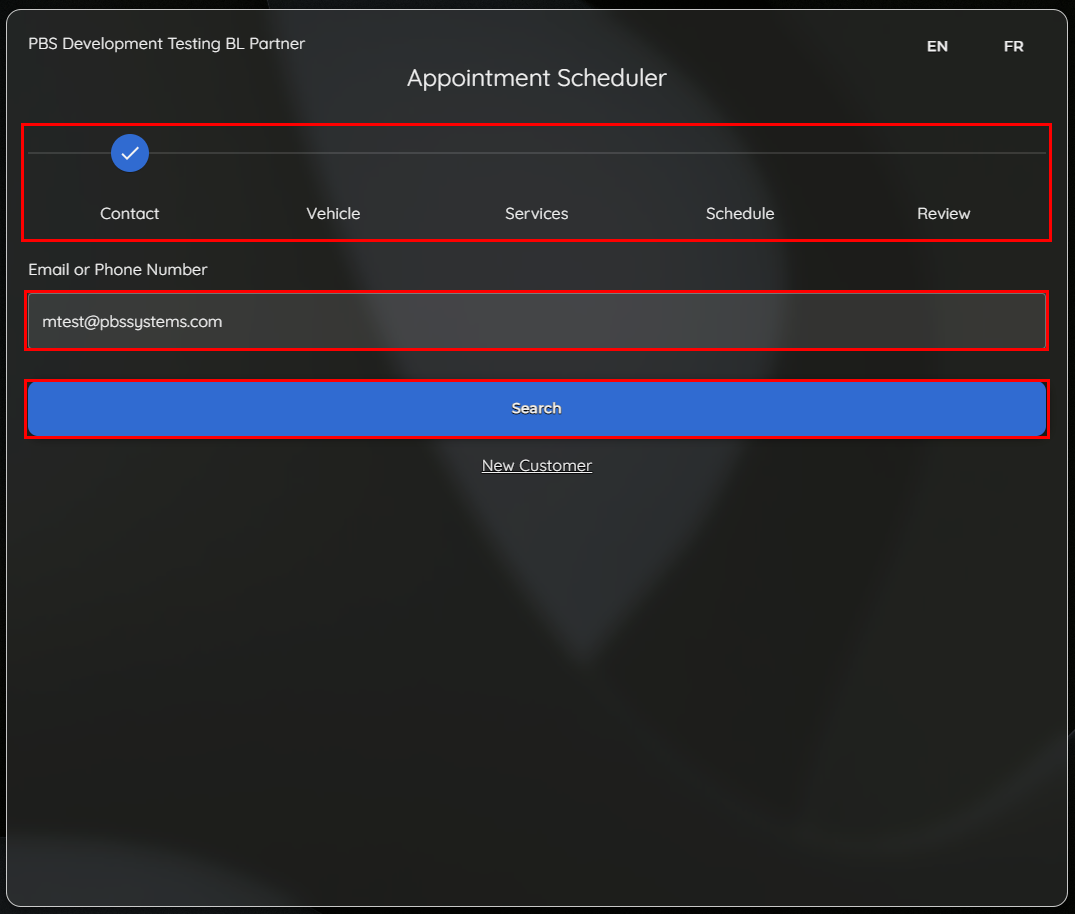
Contact Page
Let's start with the
visual timeline
at the top of the page, which guides Customers each step of the booking process.
Existing Customer
For existing Customers, the booking process begins by searching for their Contact. This step has been simplified - instead of entering multiple details (first name, last name, email address, or phone number), Customers now only need to provide either an
email address
or
phone number
in a single field. Selecting
Search
automatically finds the best match, and the enhanced search now includes
Additional Drivers
as well.
If multiple matches are found, the results will be displayed in a list with partially masked phone numbers to protect sensitive information.
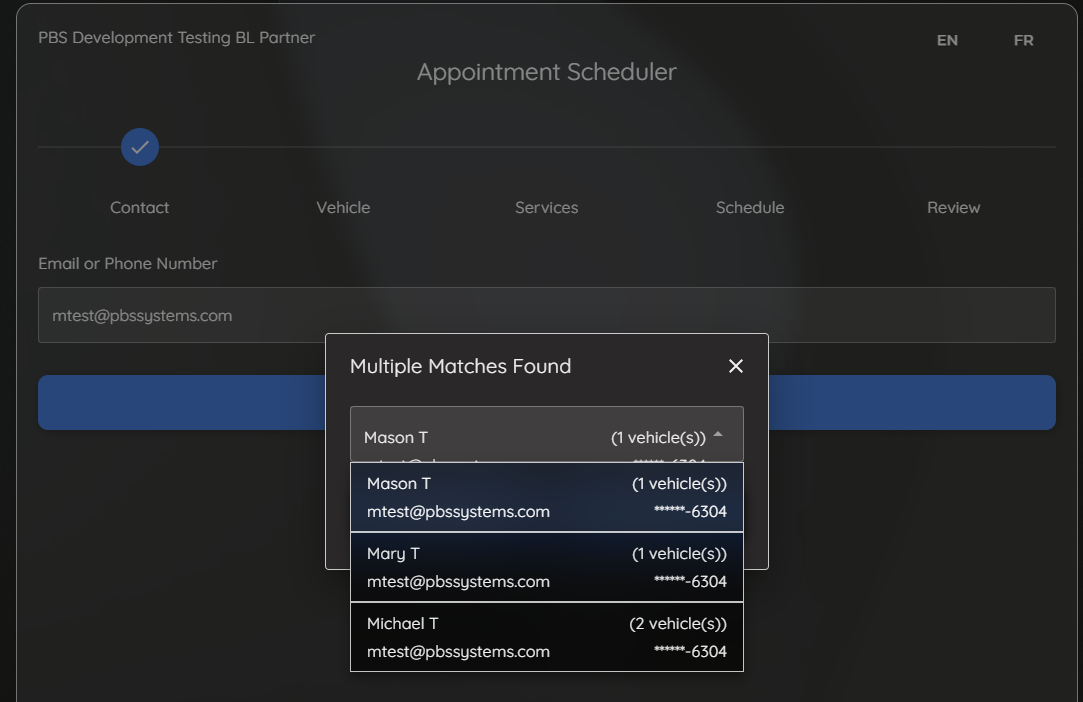
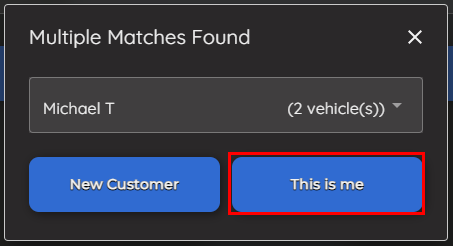
Once the correct Contact is identified, the Customer selects
This is me
to continue.
Note
: The process for
New Customers
, has also been improved and is detailed later in this document.
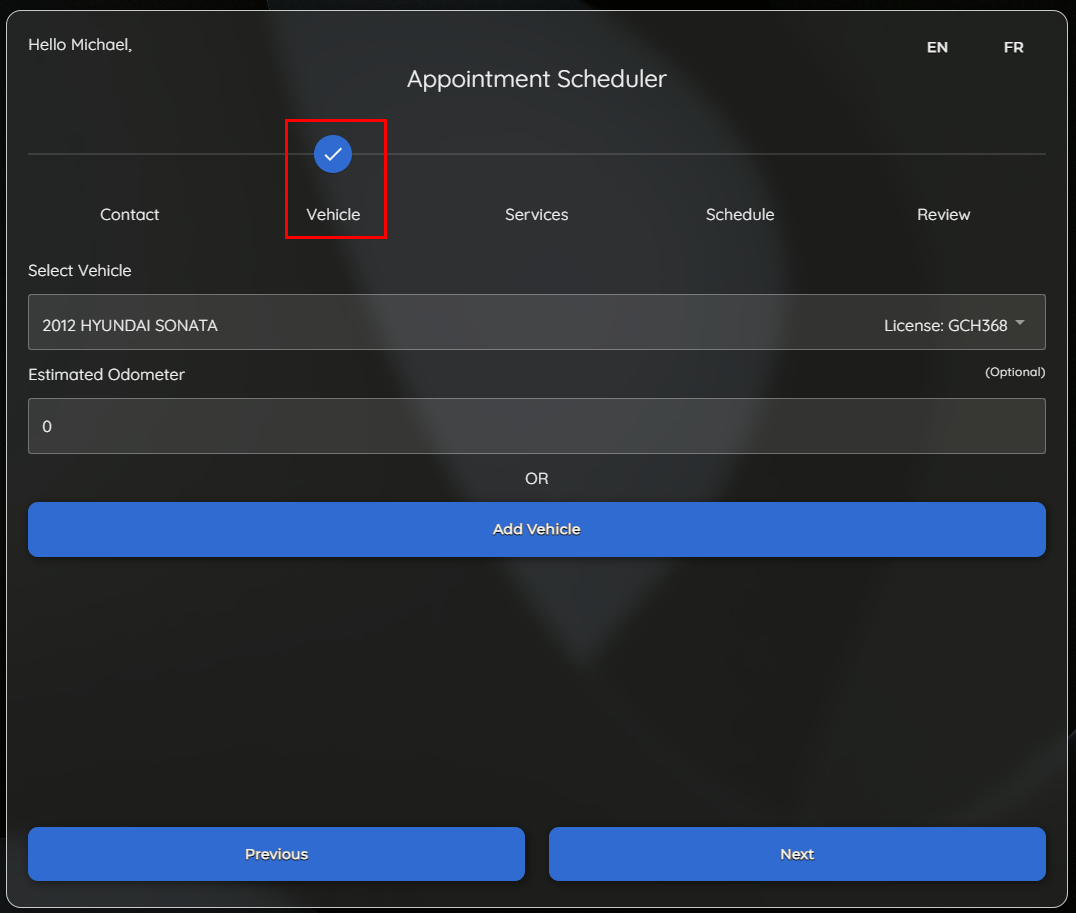
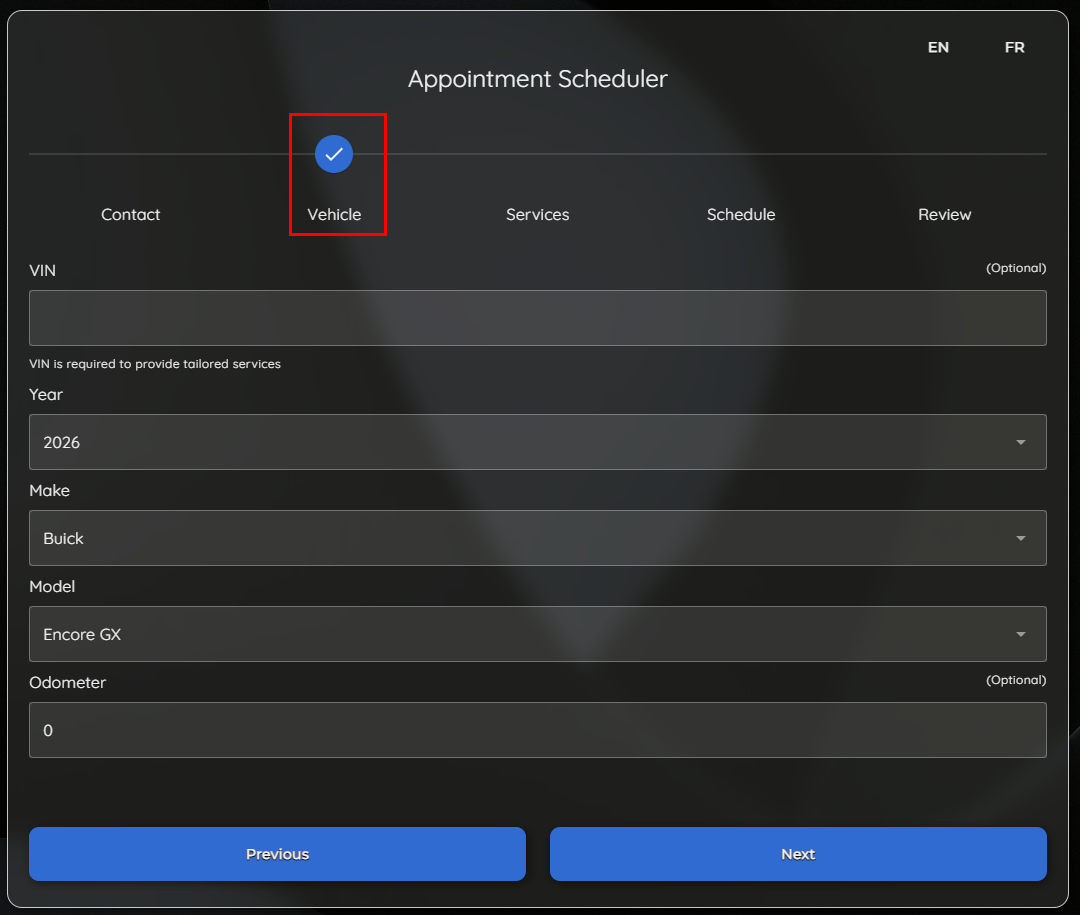
Vehicle Page
At this step, the Customer can either select an
existing Vehicle
or add a
new
one. The process is much the same as in the previous version. Selecting
Next
will take them to the Services page.
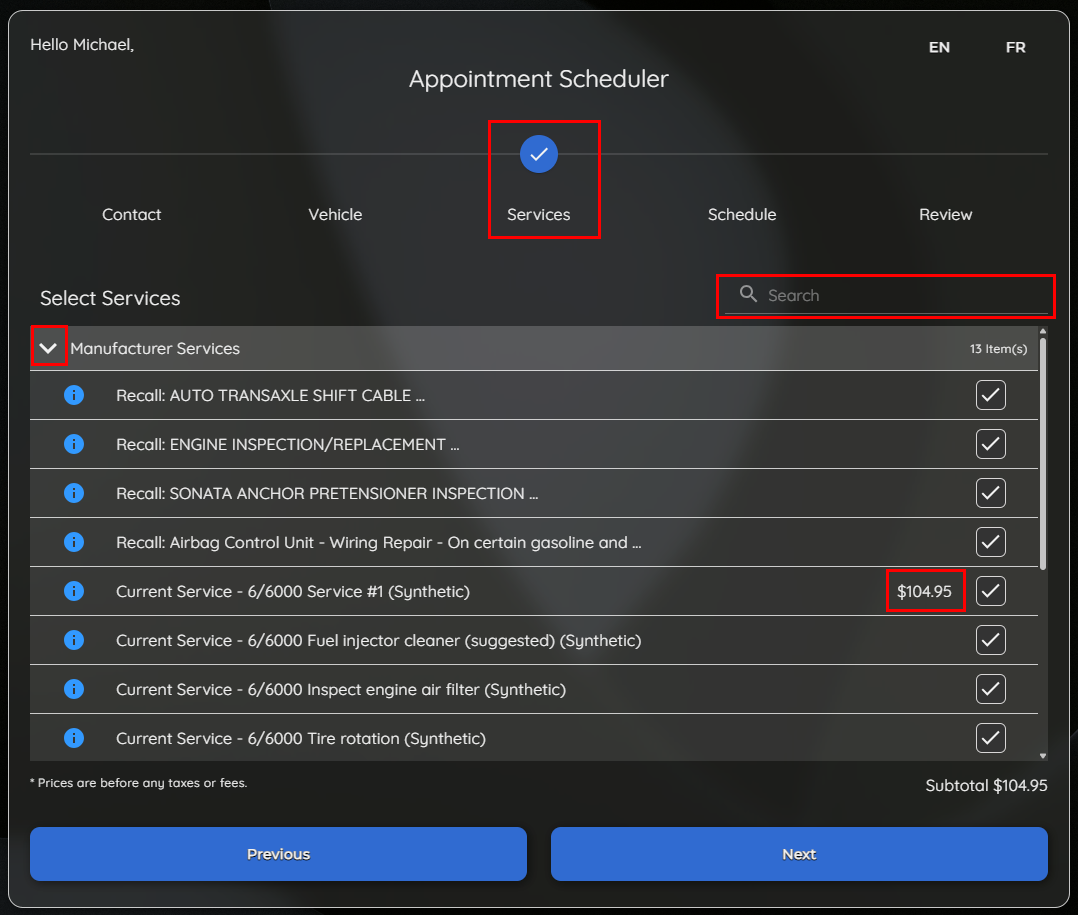
Services Page
To improve usability, only the first section is expanded by default, while all others remain collapsed. This creates a cleaner, more consistent layout and reduces the visual weight of the
Other Services
section. Customers can easily control their view by clicking the
downward arrow
to collapse a section or the
right arrow
to expand it.
If
Manufacturer Services
are available for the Vehicle, that section appears first and expanded automatically. Otherwise, the
Common Services
section opens by default to display Web Op Codes. The
Display Pricing
option (covered earlier in the setup section) is shown next to each checkbox, allowing Customers to quickly review pricing before making a selection.
For longer service lists, a
keyword search
is available to help Customers quickly find what they need.
Clicking
Next
advances to the Transportation Types step.
Transportation Prompt
A new pop-up window appears in the center of the page, prompting Customers to choose a Transportation option before continuing.
In the example below, the
first three options
use
custom web descriptions
while the
last two
display default
web-friendly
names because no custom descriptions were configured. These descriptions are designed to be clear and concise, helping Customers quickly understand their choices.
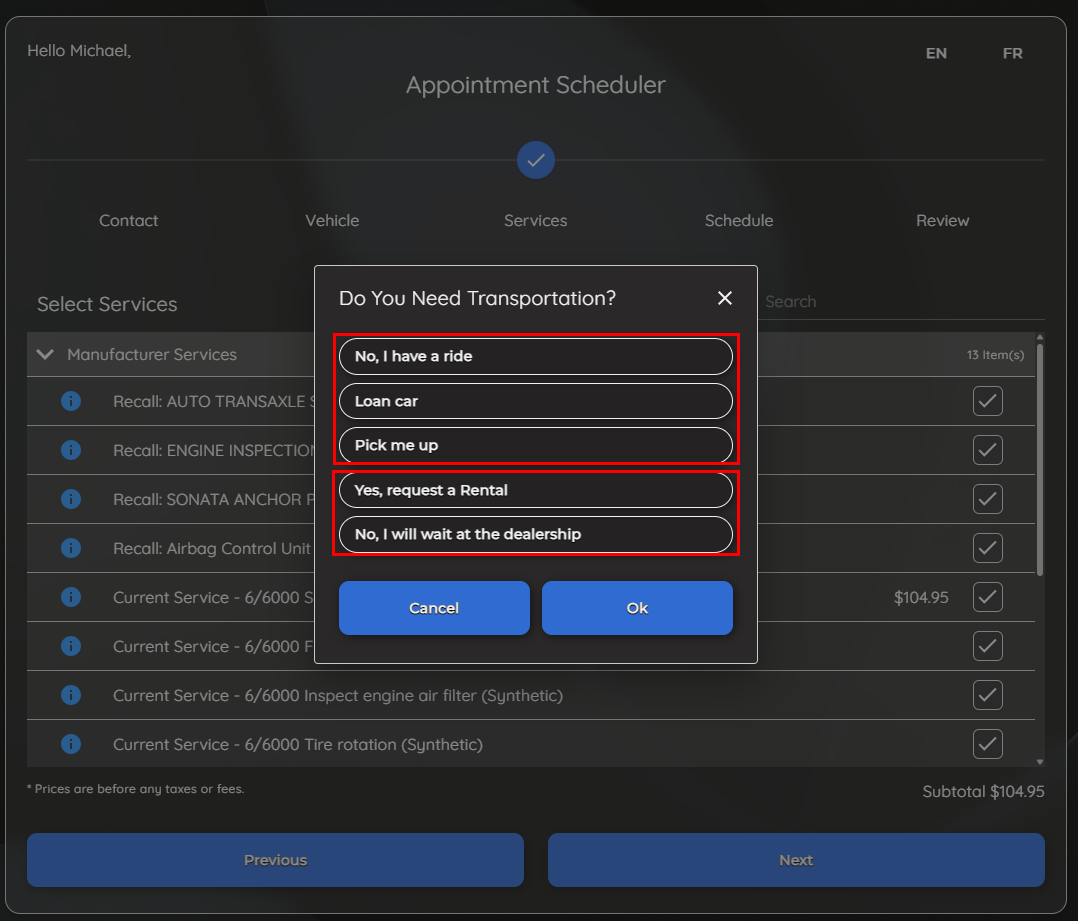
After making a selection and clicking
Ok
, the Customer is taken to the Schedule page.
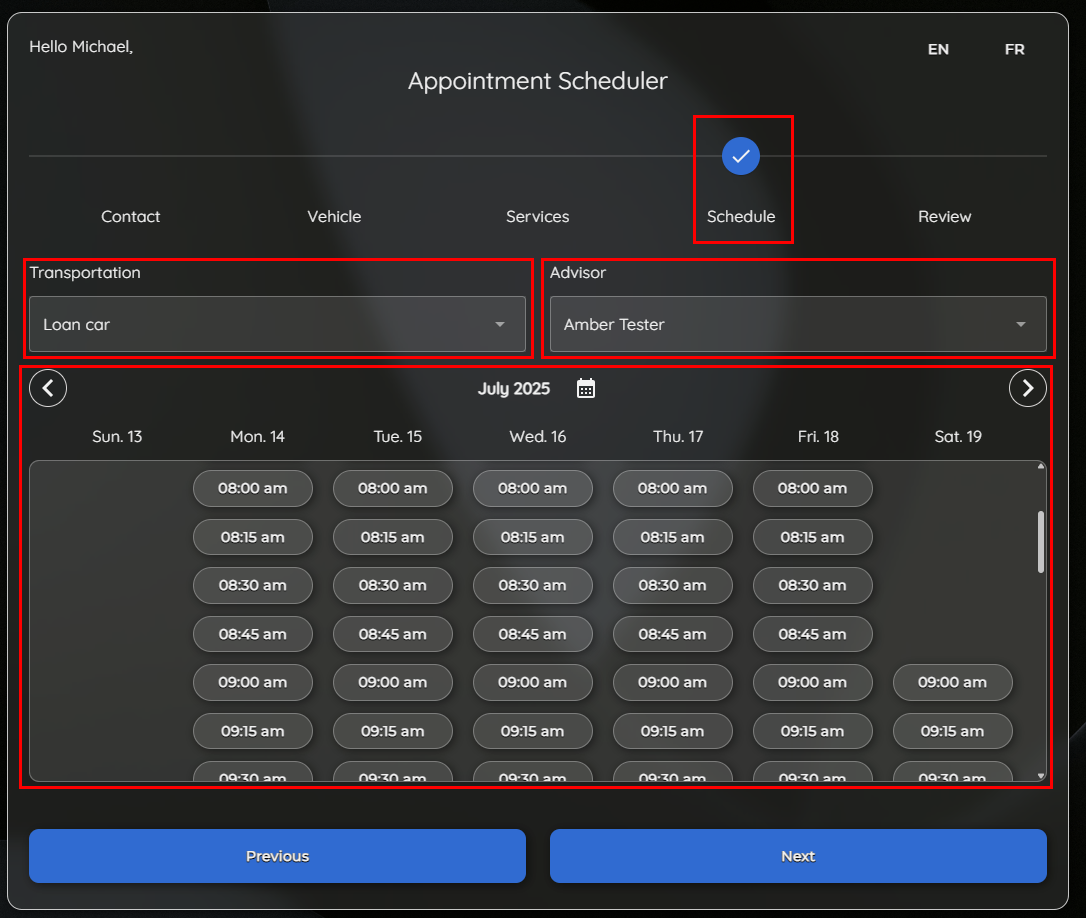
Schedule Page
The
selected transportation type
is prominently displayed on this page. If a default Advisor has been configured in Shop Maintenance, their name will automatically populate in the
Advisor
field. Customers can still choose a different Advisor from the drop-down list, which is ordered according to the
Web Display Sequence
set in User Maintenance.
Available time slots for the current week are shown, and Customers can easily navigate to future or previous weeks using the
arrow
controls. After selecting a preferred time and clicking
Next
, they are taken to the Review page.
Review Page
On this page, the Customer can review all key details before confirming the Appointment.
If a Customer needs to update their contact information since their last visit, they can do so by clicking the
pencil icon
, which opens a convenient pop-up form.
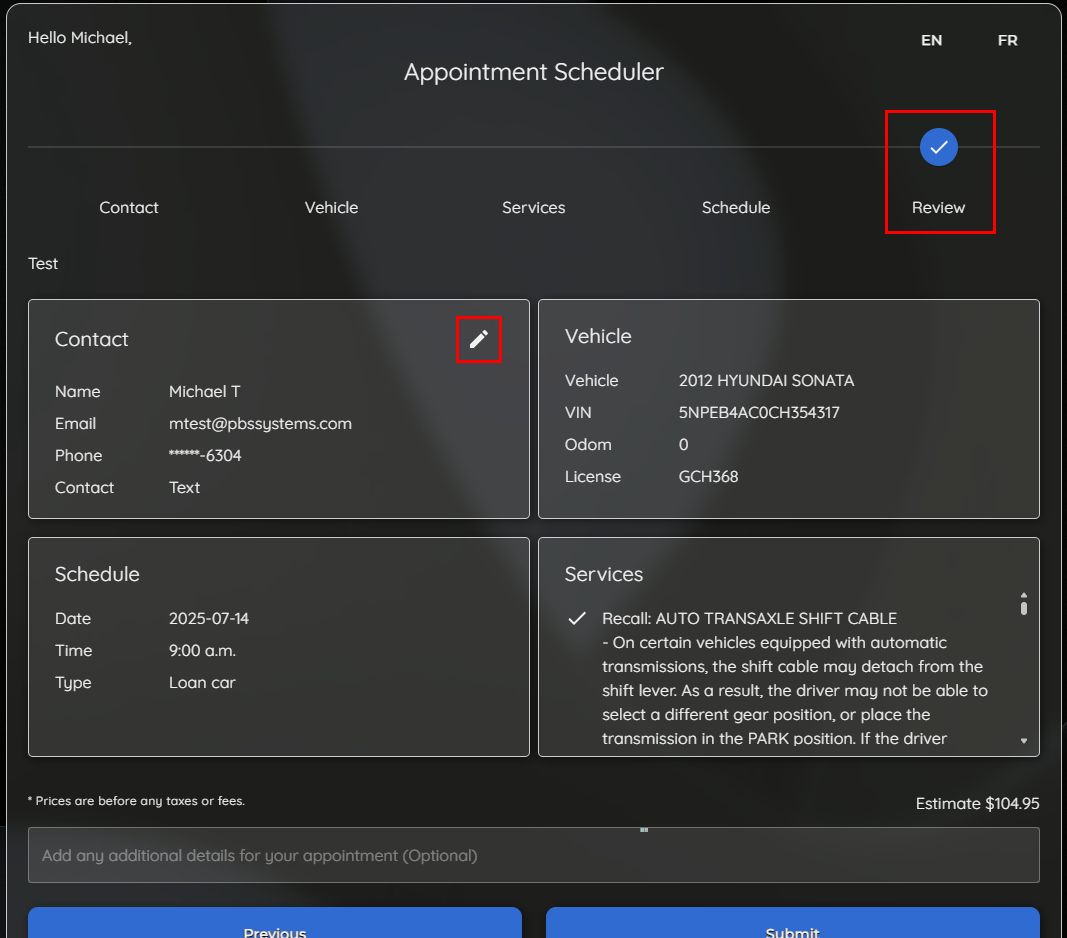
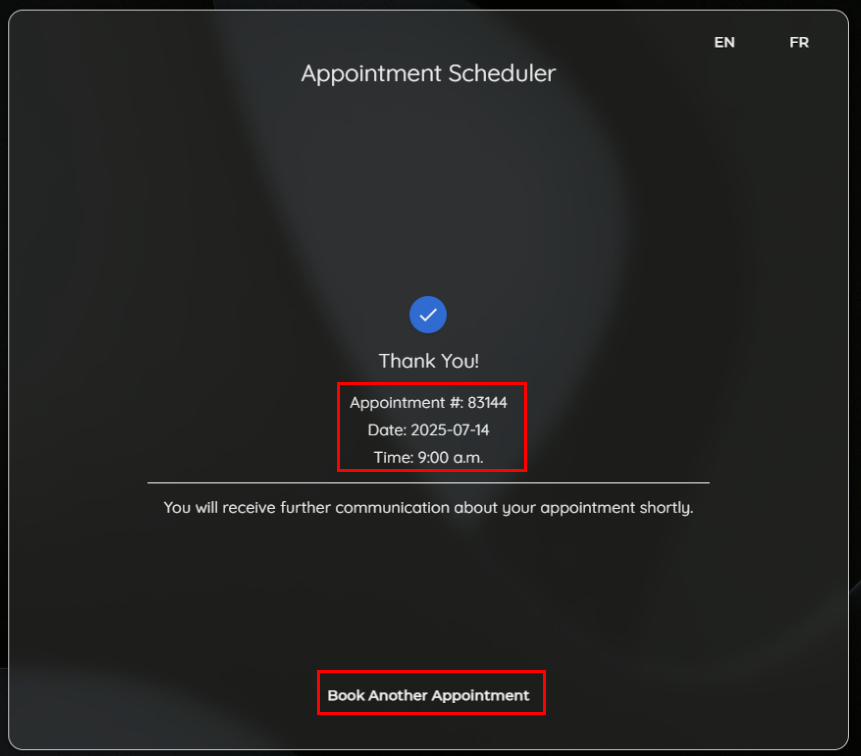
After submitting the Appointment, a
confirmation page
is displayed, showing the Appointment number, date and time. This number is useful for quickly locating the Appointment if the Customer contacts the Dealership for updates or changes.
A quick link is also provided to easily book another appointment if needed.
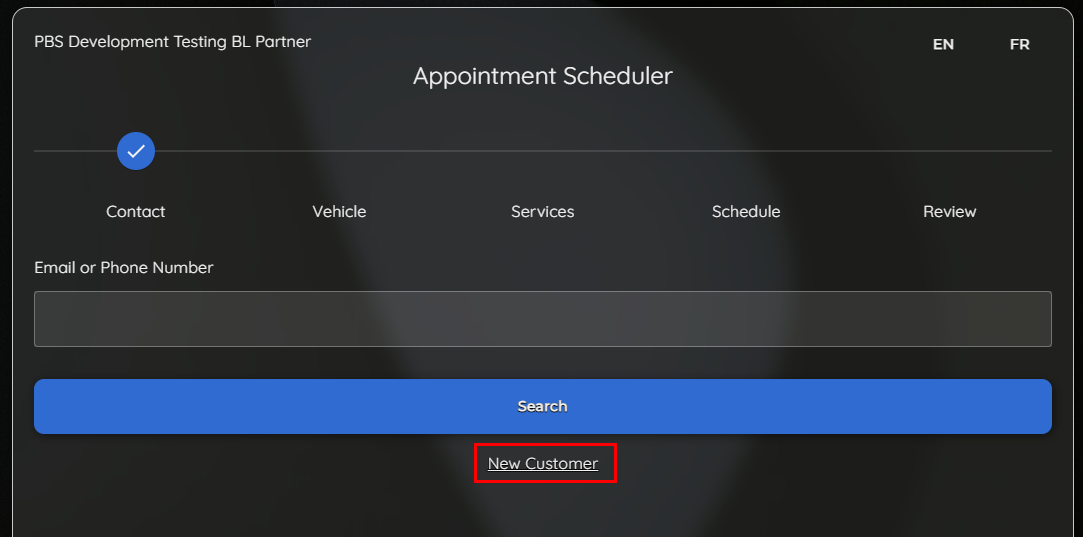
New Customer
To make booking easier for new Customers, we've streamlined the process for greater efficiency. All available time slots are now visible upfront - before entering contact details - so Customers won't have to complete every step only to discover no availability. Since new Customers typically know which vehicle they're bringing in, selecting
New Customer
takes them directly to the Vehicle page.
Make
As described earlier in the setups section, Dealerships can configure a
default Make
to appear at the top of the list, saving Customers from scrolling through all options. This is especially helpful when most new Customers are booking for the same Make, further streamlining the process and improving the experience.
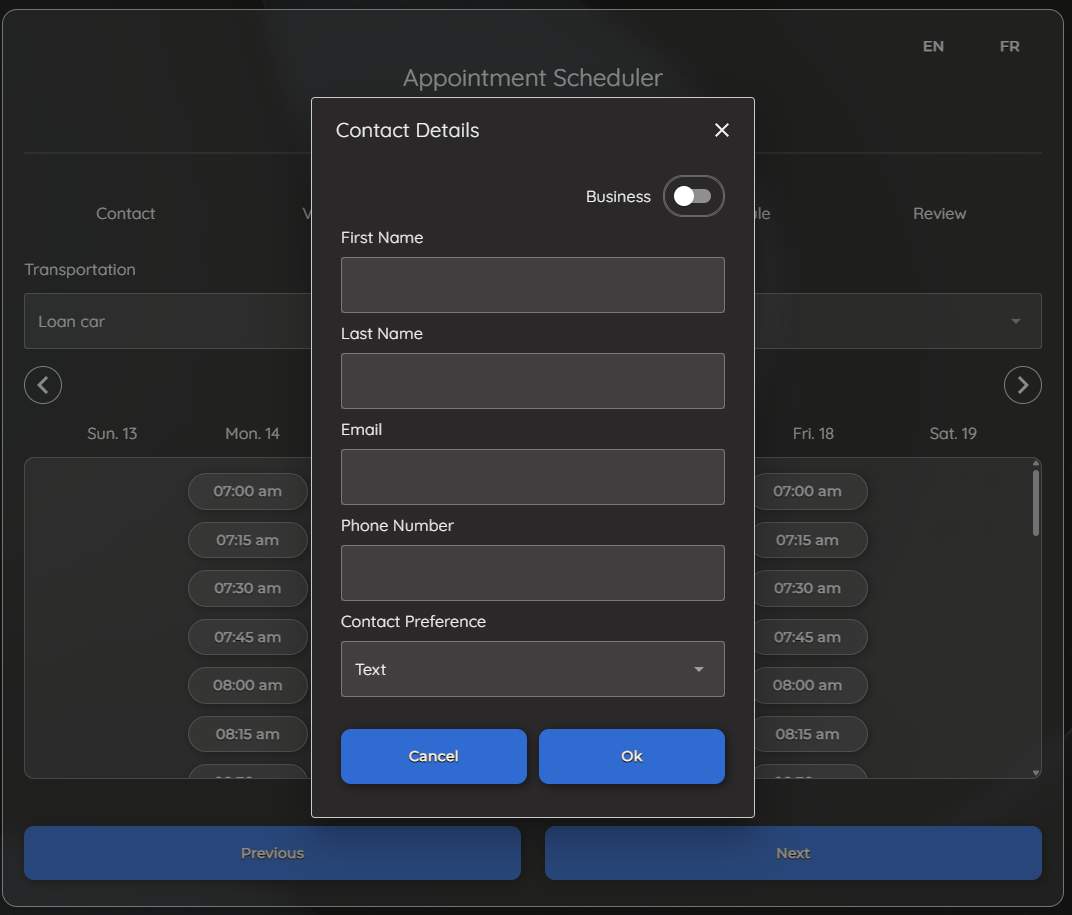
Clicking
Next
takes the Customer to the Services, Transportation, and Scheduling steps. Once the Appointment details are confirmed, the system prompts for
Contact information
as the final step via a pop-up window. A Business toggle is also available, allowing fields to switch from Customer details to Business details when needed.
|