|
10.11 Email Manager
KB 1621, Release Note, Messenger, 1/8/2021
*This document will review how to access Email Manager and Email Manager Functions.
To see how to associate an Email to a User
KB 1639 Click Here
New Email Notification
Once a Users email account is set up they will see a new mail icon in the top right corner of the software.
If you have new emails the icon will indicate this with a red circle and the number of unread emails. Email indicator will appear for any new incoming emails where the User has membership not just their default or emails assigned to them.
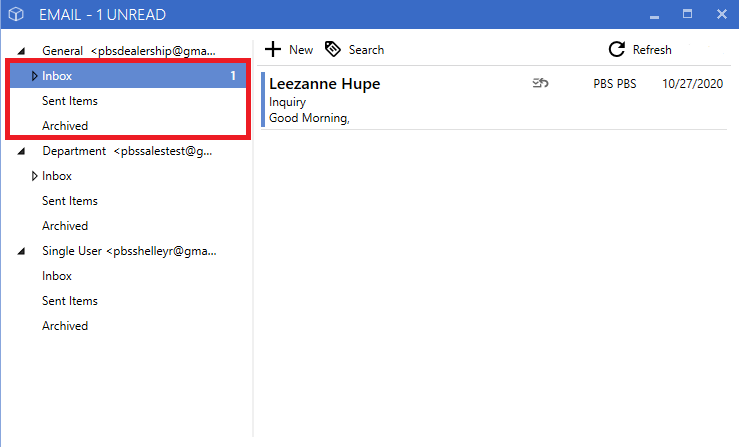
Click the icon to open a separate window to view your Inboxes.

Here Users will be able to access all inboxes that they have permission to view. Your Default account will appear on the top of the list if you have access to more than one.
Inbox:
Contains any new incoming emails, as well as any previously read emails that have not been moved to Archive
Sent:
Contains all outgoing emails from this specific account, whether sent from the Mailbox or from other areas of the Software.
Archived:
Any emails moved to Archived can still be reviewed in this mailbox folder.
Mailbox Functions
New:
Opens in a new window; Email can be sent to any Contact, User, or any other email address

Search:
Fuzzy search in the folder selected.

Refresh:
This will manually refresh your Inboxes

Hover Tip

Opening Emails
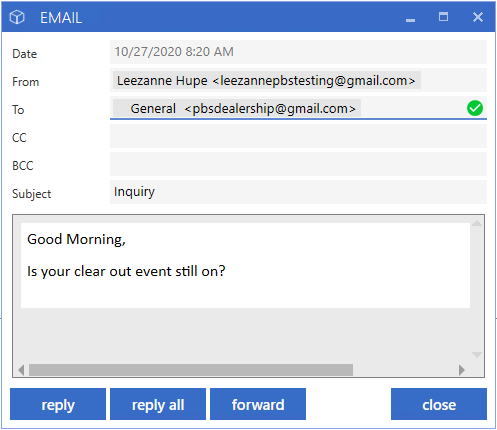
Double click any message to open the email in a separate window.

Right Click Options
Reply:
Respond to selected email
Reply All:
Respond to all recipients included in selected email
Forward:
Forward email to another recipient
View Contact:
Open a Contact record, in the Workplan view. This will be available if the incoming message is for a recognized Contact (by email).
Mark as Unread:
Changes status to unread and resets notifications beside email icon and inboxes
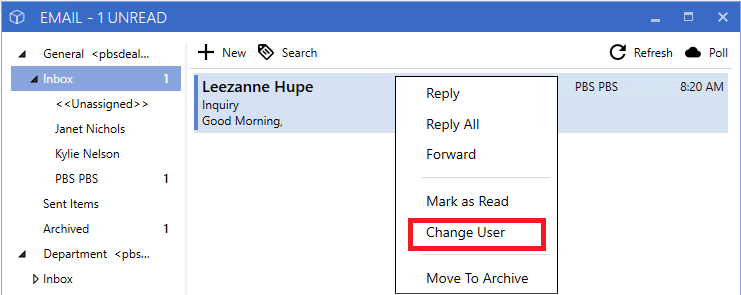
Change User:
Assign selected email to a User
Move To Archive:
Move to selected Inbox Archive folder

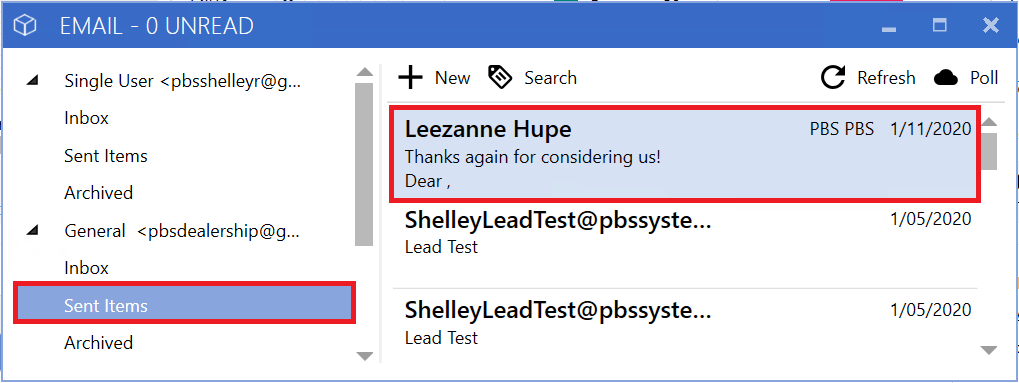
Sent Items
*Folder that stores any outgoing e-mails.
Select Sent Items folder in the desired inbox to view all outgoing emails. For more details double-click an outgoing email.
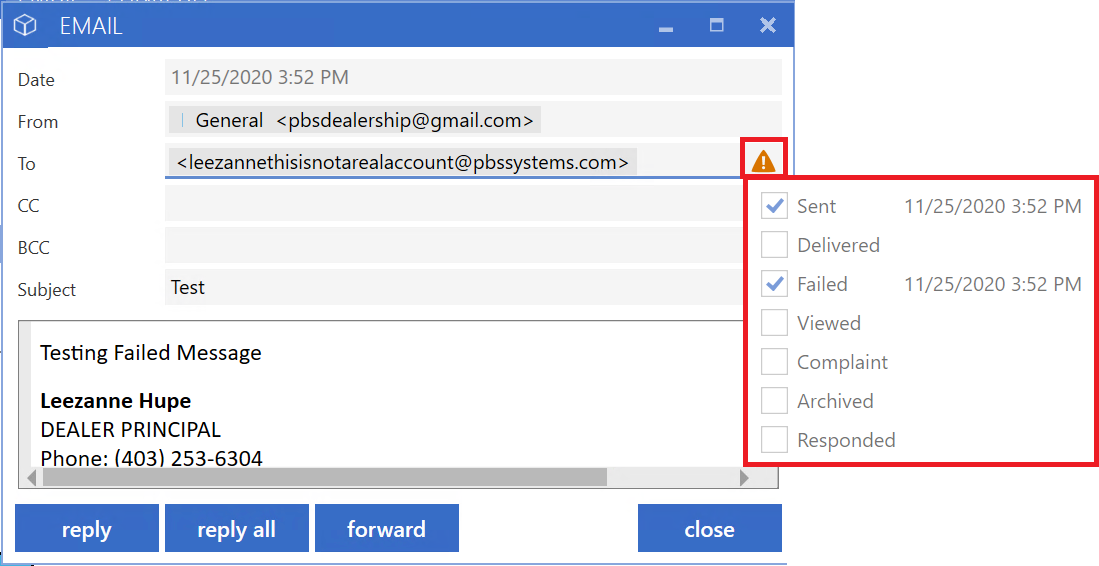
Click the icon beside the recipient email address to view more details.

Green:
Email sent and received.

Blue:
Email sent but has not been read by the recipient.

Orange:
Email failed to send.
Sent:
Email has been sent
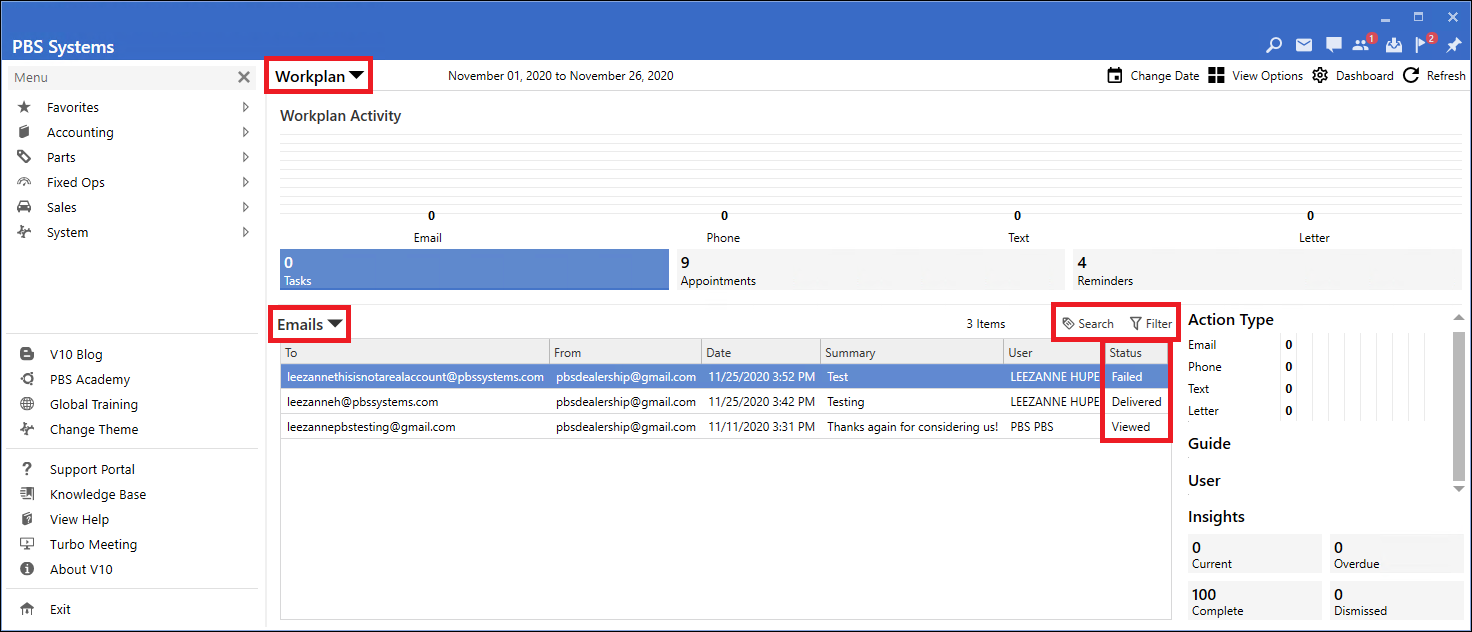
Delivered:
Email has been delivered to the recipient(s)
Failed:
Email has failed to send
Viewed:
Email has been viewed by the recipient
Complaint:
The recipient marks the Email as Spam or Junk.
Archived:
Email has been moved to the Archive folder.
Responded:
Email has been responded to


Archived
*A folder for reserving and protecting all inbound and outbound email messages.
To move an email to Archive: Highlight 1 or more emails, right-click and select Move to Archive.
Note:
Archived messages are never deleted.
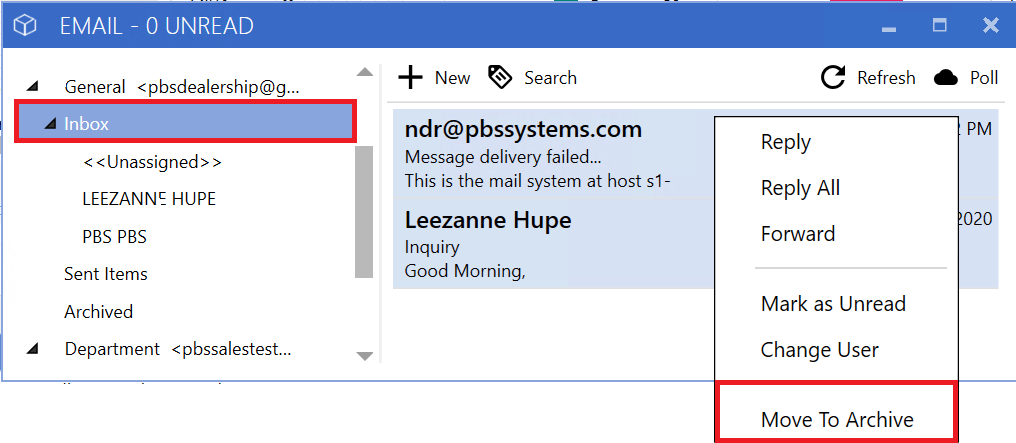
Selected Emails can now be found in the Archive folder.

Create New Email
From:
Account the email will be sent from
To:
Recipient(s)
CC:
Carbon Copy
BCC:
Blind Carbon Copy
Subject:
Introduction that identifies the intent of the email
Documents:
Send pre-set template from Workplan
Attachments:
Send saved files
Note:
The recipient does not have to be a Contact or User.

Documents
*Pre-set template responses saved in Workplan
To Add, Edit, or Delete a template, navigate through the left menu: *System > Workplan > Maintenance >Document Maintenance
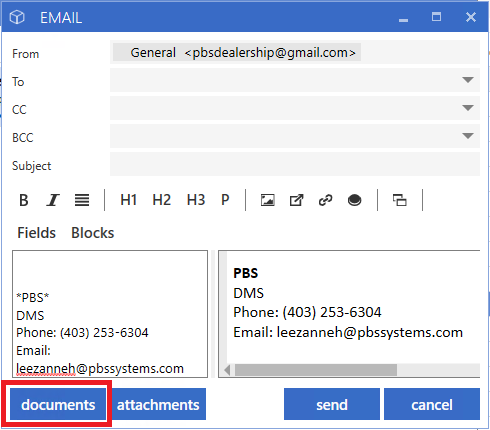
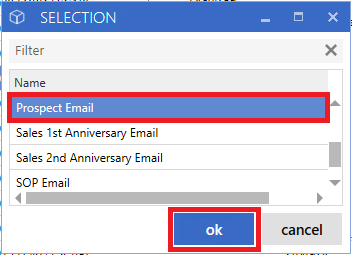
Once you have selected a Document, click "ok"
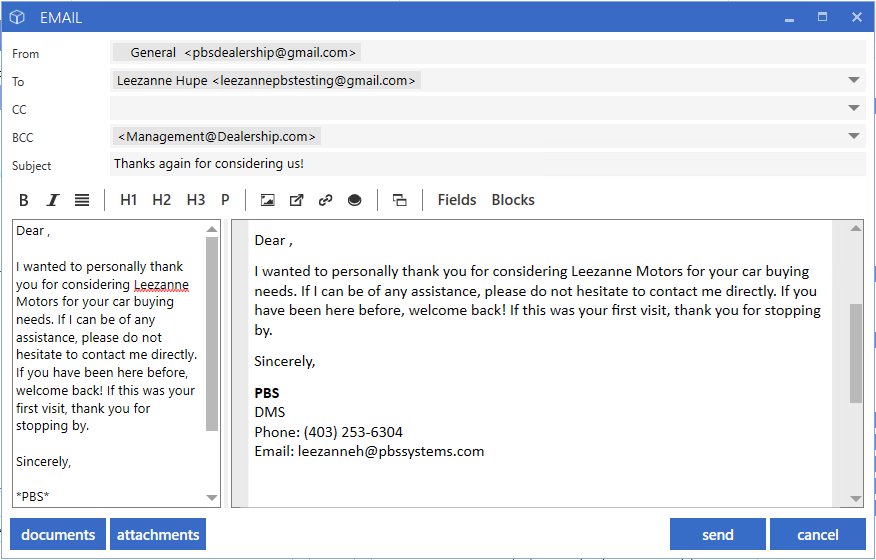
The selected Document will show in the Details field. You can Edit your Text, add an attachment, Send or Cancel the email.
Attachments
*Images An attachment can be an image, document, spreadsheet, or any other file.
Select Attachments
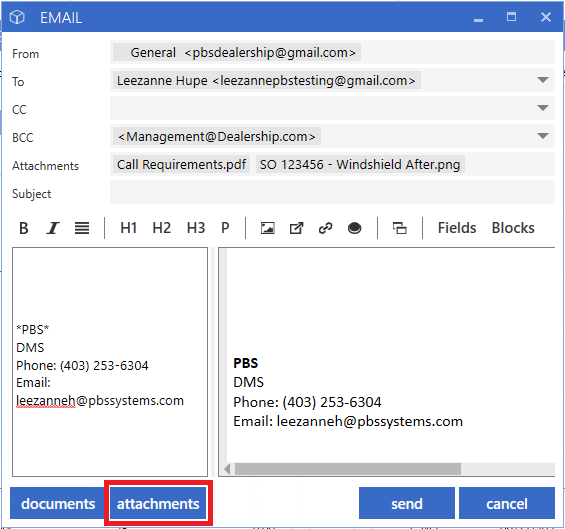
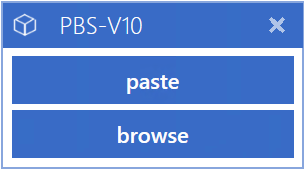
Paste:
Allows Users to insert of copied file from any location.
Browse:
Allows Users to select a pre-saved file from a shared folder.
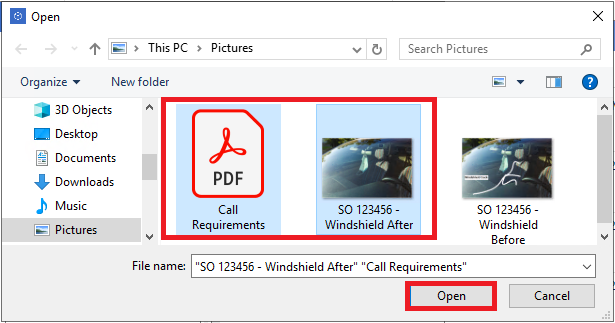
Select one or more Images to attach and click open.
How to add multiple attachments:
While holding down the Ctrl key, select all files you would like to attach.
Attached files will display, above the Details field.
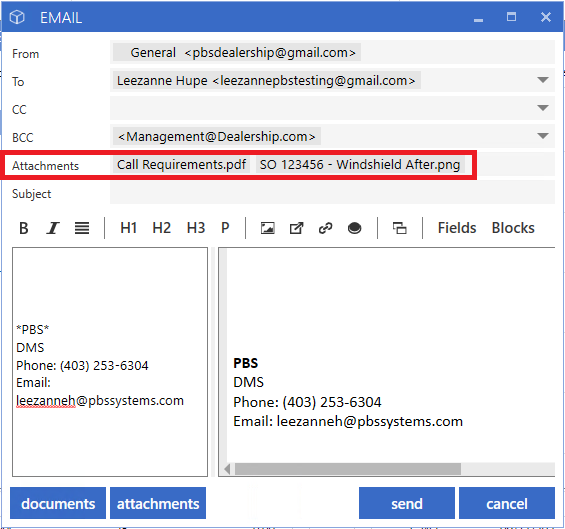
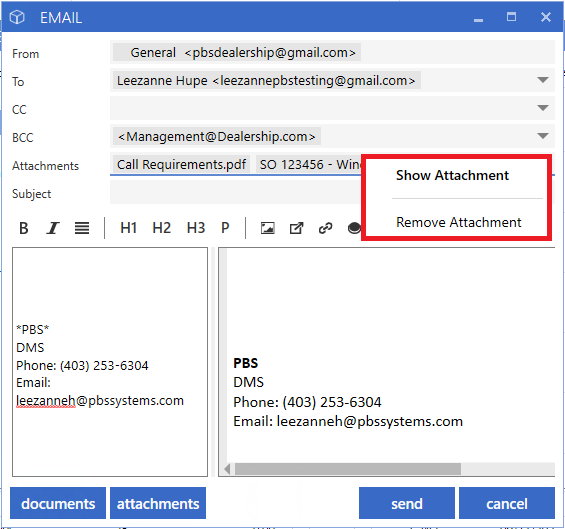
Viewing Attachment:
Double-click the file name or right-click and select Show Attachment
Remove Attachment:
Right-click and select Remove Attachment
Unassigned Emails
New emails that do not have a specific recipient will be shown in the inbox and unassigned folder.

To assign an email to a User, right-click the desired email, select Change User. and select a User from the list.
*Note: Users must be a member of the Inbox to be assigned to the selected email.
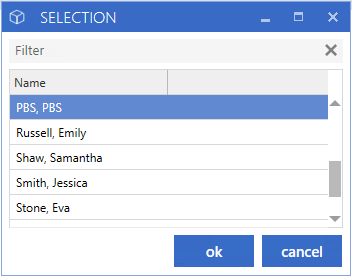
Changing the User will do 3 things:
1. Move the email from the "Unassigned" folder to the selected User's folder.
2. Mark the email as unread in all inboxes
3. Show assigned User's name in the email subject line
Users are able to reassign an email to another User by using the same right-click function.

A reply indicator will appear in the subject line once the User has replied to the email.

Workplan - Email
*This new feature allows Users to view and track outgoing emails and their Delivery status
*Workplan Dashboard > Tasks > Emails
The information shown is based on Users who have sent out emails from software for the date range specified. From here you can view the latest delivery status by email/user as well as narrow down results with Advanced Filter capability.

|