|
10.11 Chat Manager
KB 1632, Release Note, Messenger, 4/14/2021
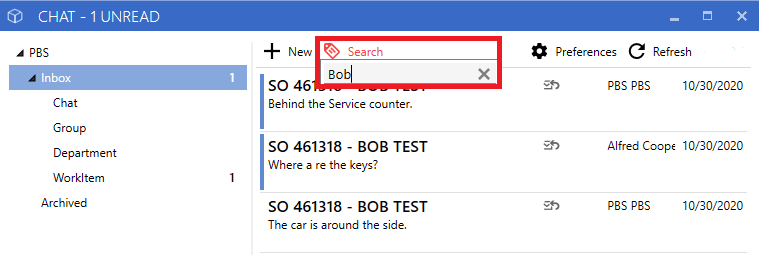
*This document will guide you though the update Chat Inboxes and Chat Inbox functions
Once Users log in they will see a new Chat icon in the top right corner of the software.
If you have a new Chat the icon will indicate this with a red circle and the number of unread chats.
Click the icon to open a separate window to view your Inboxes.

Here you will be able to access your inbox and work items that have permission to view.
Inbox:
Contains any new incoming chats, as well as any previously read chats that have not been moved to Archive
Chat:
1 on 1 and Multi-users not in a group
Group:
Multi-Users i.e. Managers
Department:
One Way Broadcast i.e. Sales Department
Work Item:
Specific to a Work Item
Archived:
Any chats moved to Archived can still be reviewed in this folder.

New
Opens in a new window; a Chat can be sent to any User.

Search
Fuzzy searches all Text messages for the folder selected.
Notification Preferences
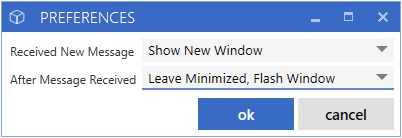
Notifications will work based on each User's preferences in Chat Manager. There are three options for Chat notifications:

1.
Show chats flashing on my taskbar. Select "Show New Window, Leave Minimized, Flash Window.
*Note: This is the default setting
2.
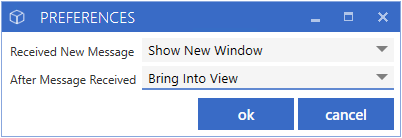
Show chats instantly in the middle of my screen. Select Show New Window, Bring Into View.
3.
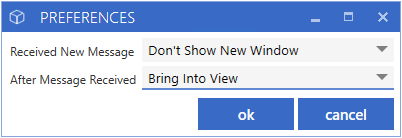
Show a red number indicator on the top of my screen. Select "Don't Show, New Window.
Refresh
Manually refresh your inboxes.

Expanding Tooltip
Hover over dates and folders with your tooltip for full details

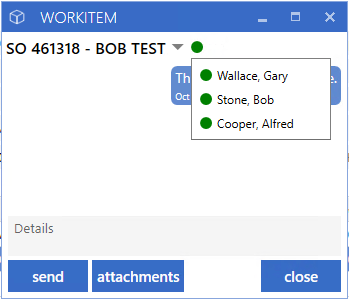
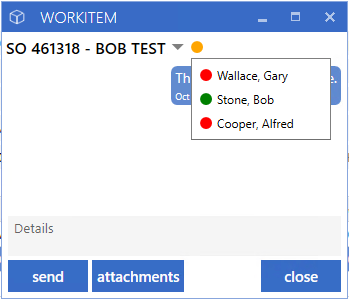
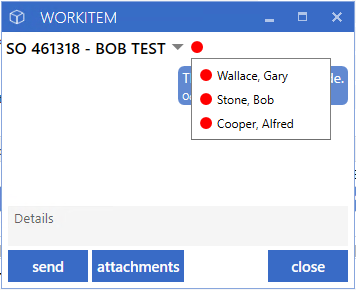
User Availability
Green:
All Users are Online
Yellow:
Some Users are Offline
Red:
All Users are Offline
New Chat
While in the Chat inbox, select New.

From:
The User logged in
To:
Recipient(s)
Details:
Write your Message here
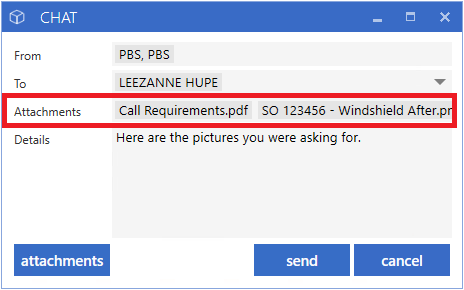
Attachments:
Send saved files
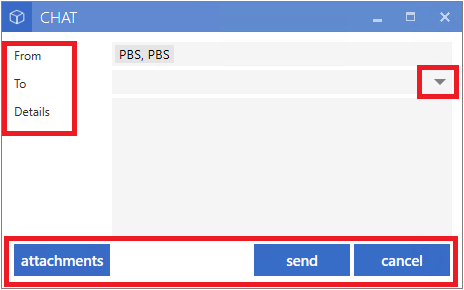
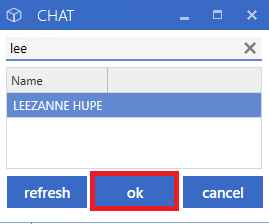
Click the drop-down menu to view a list of Users, search and select the desired recipients, then select ok.
Attachments
*An attachment can be an image, document, spreadsheet, or any other file.
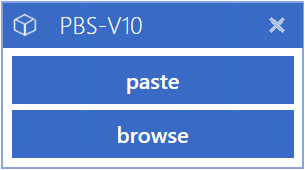
Paste:
Allows Users to insert of copied file from any location.
Browse:
Allows Users to select a pre-saved file from a shared folder.
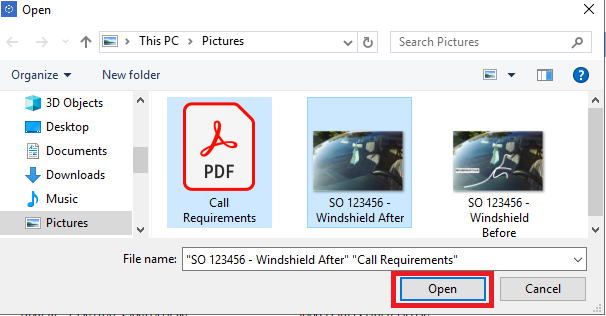
Select one or more Images to attach and click open.
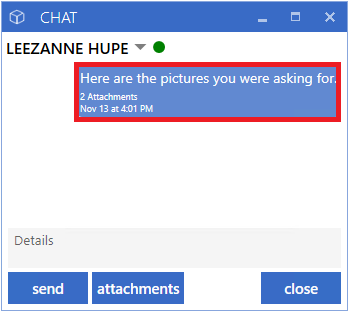
How to add multiple attachments:
While holding down the Ctrl key, select all files you would like to attach.
The attached files will display above the Details field.
Viewing Attachment:
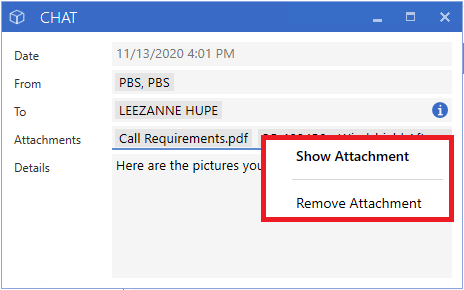
Double-click the file name or right-click and select Show Attachment
Remove Attachment:
Right-click and select Remove Attachment.
Attachment Options
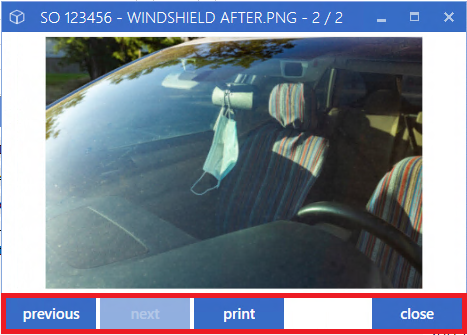
Previous:
Shows previous attachment
Next:
Shows next attachment
Print:
Prints attachment
Close:
Closes the window
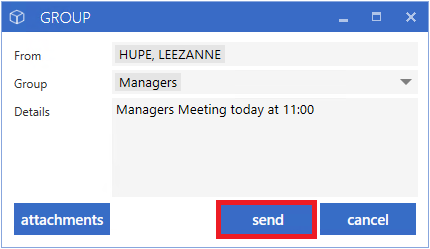
New Group
*A multi User Chat with Users who have member access to the group.
While in the Group inbox, select New.

From:
The User logged in
Group:
Group of Recipients
Details:
Write your Message here
Attachments:
Send files
Click the Group drop-down and select add in the Group pop up window.
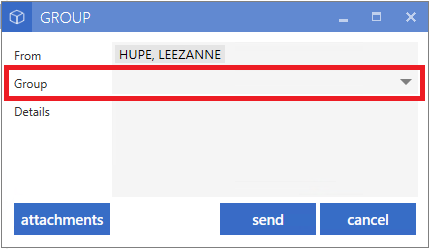
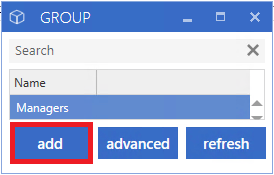
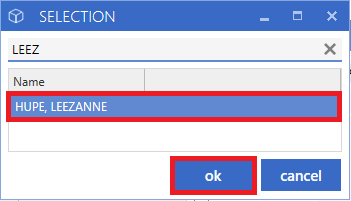
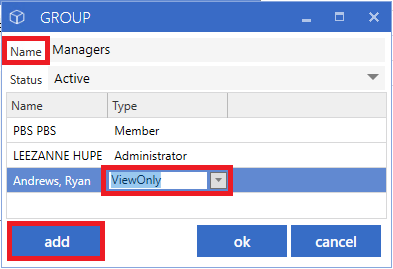
Give the group a name and select add to view a list of Users. Select one or more Users by using the search filter or highlight a User(s) name and click ok.
How to select multiple Users:
While holding down the Ctrl key, select all Users you would like to add.
Choose a membership for each User.
Administrator:
User can send and receive chats as well as add, and remove other Users in the group.
Member:
Users can send and receive chats.
View Only:
Users can view Chat messages but cannot reply.
Once all Users have been added to the group select ok.
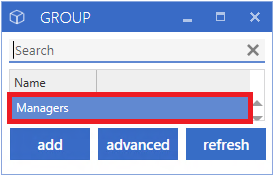
Double-click your new group to start your chat.
After you have finished writing your message you can add attachments, or send as is.
*See how to add attachments above
New Department
*A 1 way broadcast to 1 or more Departments.
Add or Edit Departments: *System > Departments > Add/ Edit
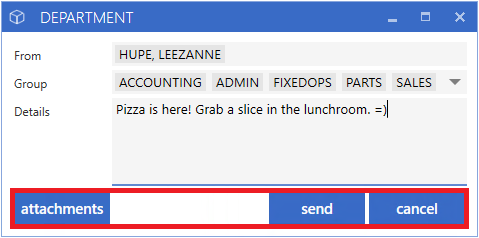
While in the Department inbox, select New.

From:
The User logged in
Group:
Selected Departments
Details:
Write your Message here
Attachments:
Send files
Select the Department(s) you would like to broadcast a message to and click ok.
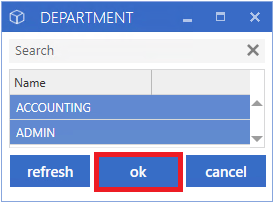
After you have finished writing your message you can add attachments, or send as is.
*See how to add attachments above
Workitem Chat
*Group chats specific to a work item
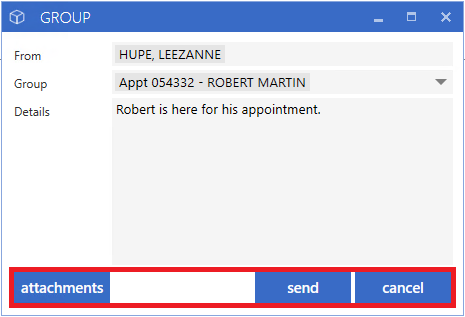
While in the Work item inbox, select New.

From:
The User logged in
Group:
Members in a Work Item Chat
Details:
Write your Message here
Attachments:
Send files
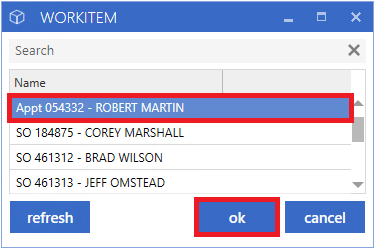
Click the Group drop-down and select a work item.
Note:
Only work items that a User is assigned to or has permission to view will show on this screen
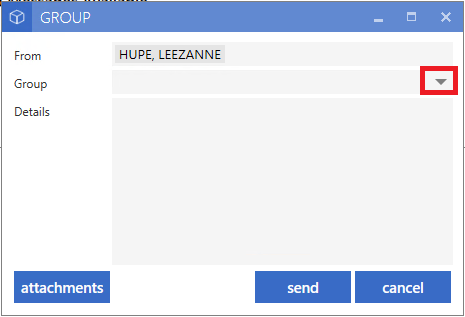
Double-click a work item or highlight and press "ok" to start a char or view an ongoing chat.
After you have finished writing your message you can add attachments, or send as is.
*See how to add attachments above
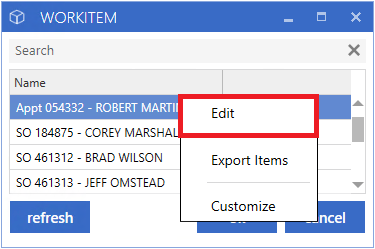
Adding a User to a Work Item Chat
Right-click on a Work Item and select Edit.
From here you will be able to view and add Users to a Work Item Chat.
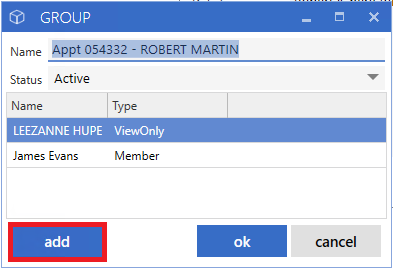
Select one or more Users by using the search filter or highlight a User(s) name and click ok.
How to select multiple Users:
While holding down the Ctrl key, select all Users you would like to add.
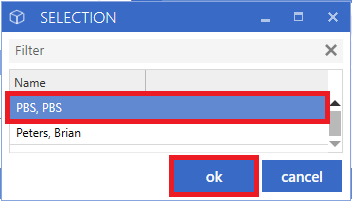
Choose a membership for each User and select ok.
Administrator:
User can send and receive chats as well as add, and remove other Users in the group.
Member:
Users can send and receive chats.
View Only:
Users can view messages but cannot reply.

For more information on Work Item Chat
KB 1675 Click Here
|