|
10.23 Parts Patch Updates
KB 3341, Release Note, Parts Sales, 8/24/2026
This document provides an overview of small Parts enhancements incorporated into Patch Releases within version 10.23. These changes are available from version 10.23.1 onwards.
Keep an eye out for our 2025 Dealer Conference logo - it indicates features that were requested during the Conference and are now included in this release!
10.23.1 - Patch Updates
IPR Smart Client - Wi-Fi Scanner/Label Printing
Printing labels, such as SOP labels through the Parts scanner has been streamlined. Users can now print directly from their desktop session, without needing to connect to the server. This update offers a faster, smoother, and more intuitive experience, enabling Users to complete tasks more quickly with fewer steps.
Control Flags - Setup
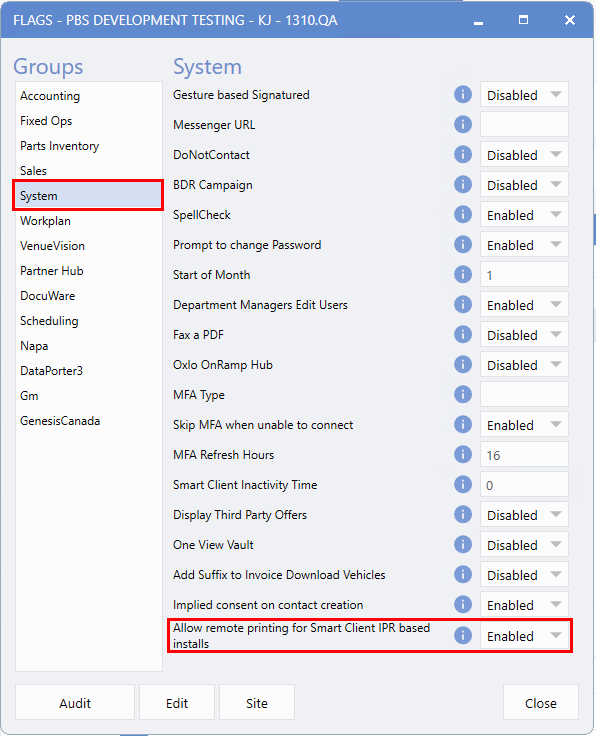
To use this feature, the new setting
Allow remote printing for Smart Client IPR based installs
must be enabled. Please contact PBS Support to have this flag activated.
Important note for PBS Support:
If the Dealership is already on IPR, the tunnel previously required for printing SOP labels through the server must now be removed, as it is no longer needed. Please ensure that the label printer is removed from the server. Leaving the printer configured on the server may cause printing issues.
PBS Support Only:
To enable the Control Flag, follow the path:
System > Tools > Control Flags > Edit > System > Allow remote printing for Smart Client IPR based installs > Enabled
Label Printer - Setup
Configuration of both
SOP Labels
and
Barcode Labels
printer must be completed by either a
Master User
at the Dealership or
PBS Support.
There are two available configuration options depending on whether you want to use the system's default label format or customize the label layout.
Please note:
-
This setup must be configured
individually on each User's computer
that will be used for SOP or Barcode label printing.
-
The printer can not be configured on the server.
-
Label printing is strictly tied to the User's active session.
-
The printer connects to the software only while the User is logged in.
-
The system will automatically select the printer based on the session printer assigned to that User.
Option 1 - Configuration through Printer Setup
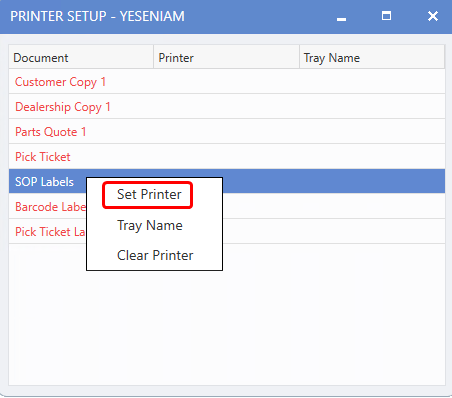
The label printer can be assigned directly from the
Printer Setup
window. This configuration immediately associates the selected printer with the current User's session for label printing.
To add a label printer to a session, follow the path:
System > Printer > Parts > Right-click on SOP Labels/Barcode Label > Set Printer > Select printer > OK
Option 2 - Configuration through Fixed Ops Control File
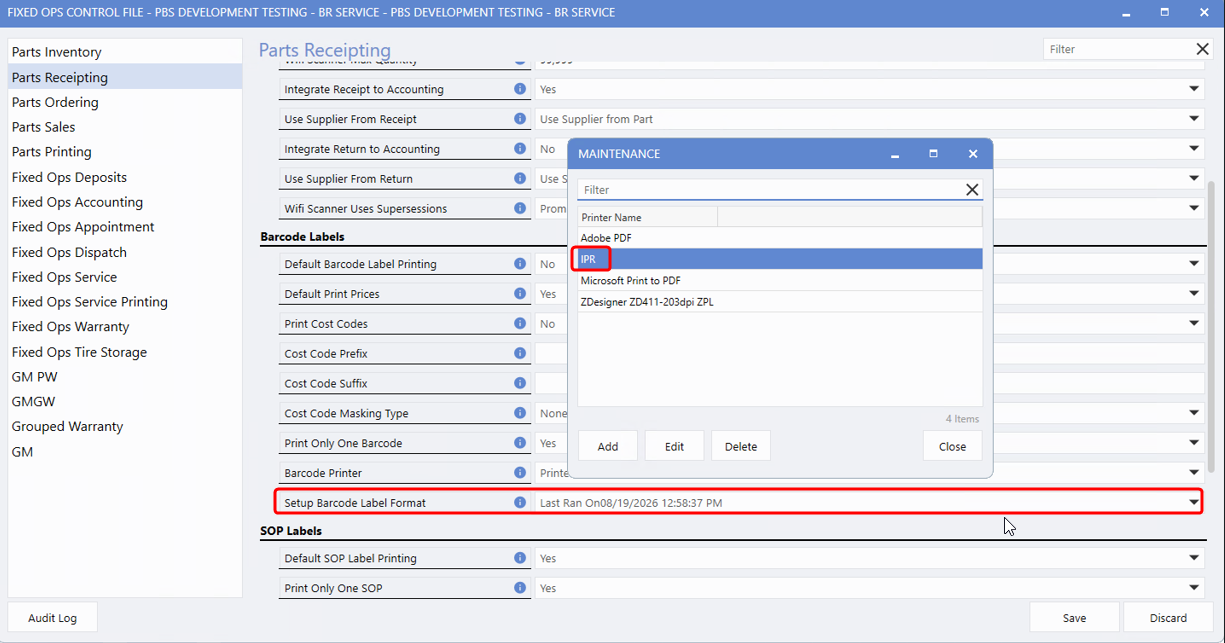
Within the Fixed Ops Control File, the
IPR
option can be used to create and modify custom SOP and Barcode label layouts. This option is intended for Dealerships that require customized label formats. Alternatively, Users can continue using the default label format within the system.
Note:
The printer set up will
only
be used for printing custom labels via the Scanner. All other printing jobs, e.g. reports, will continue to print to the User's default printer.
To add a label printer to a session, follow the path:
System > Maintenance > Fixed Ops Control File > Parts Receipting > Edit > Setup Barcode Label Format/Setup SOP Label Format > Double-click on IPR to custom your label layout
Label Format - Report Layout Designer
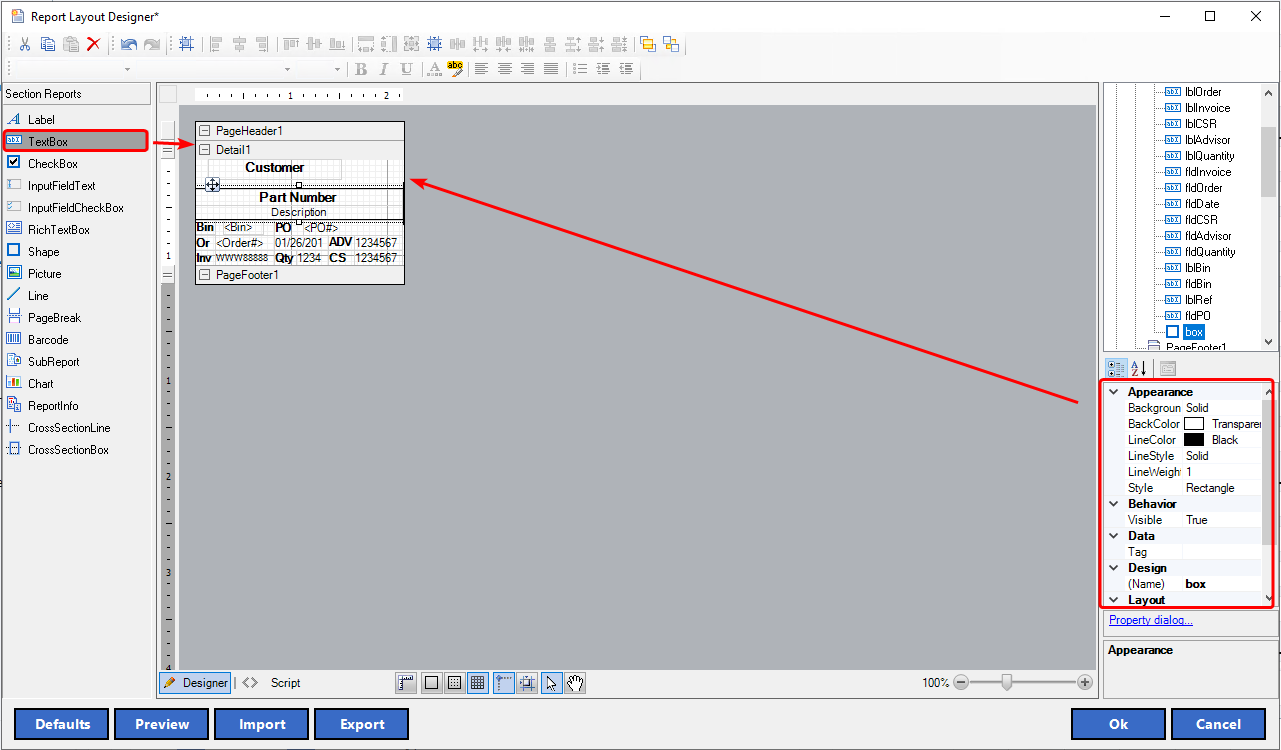
The
Report Layout Designer
window launches when configuring your printer through the Fixed Ops Control File after following the steps described above in Option 2.
This tool allows you to
customize
the appearance and content of SOP and Barcode labels to meet Dealership-specific requirements. Use the
TextBox
tool to edit or add label fields. Existing fields that are part of the standard layout can be modified as needed. Additional formatting options are available in the
right-hand panel,
including font settings, alignment, spacing, and other display attributes.
|